
The spark was tiny, but the silence that followed was deafening. I was sitting at my dining room table, surrounded by loose screws and a generic battery I’d bought for twenty bucks on a whim. I thought I was being a DIY hero, reviving my old machine instead of hunting for unbeatable laptop deals. But I didn’t ground myself, and I used a metal screwdriver to nudge a connector that really didn’t want to move. Pop. Static discharge is a silent killer, and in that moment, my favorite laptop became an expensive paperweight. I learned the hard way that while swapping a battery seems like a “five-minute job,” there are a dozen ways to accidentally sabotage your hardware. Today, I’m going to walk you through exactly why these mistakes happen and how you can avoid the heartbreak of a fried motherboard. [IMAGE_PLACEHOLDER]
Why Your Kitchen Table is a Dangerous Lab
Replacing a battery isn’t just about unscrewing a plastic panel; it is about managing volatile chemical energy. Whether you are upgrading student laptops or trying to extend the life of high-performance gaming laptops, the internals are more fragile than they look. Most people jump straight into the teardown without realizing that modern components are packed tighter than a suitcase on a budget airline. One slipped tool can pierce a cell or snap a ribbon cable that is thinner than a human hair. I’ve talked to dozens of people who, like me, thought they could wing it. Before you even touch a screwdriver, you need to know how to verify the battery health properly so you aren’t replacing a part that isn’t actually the problem. Have you ever opened up your device only to realize you were completely in over your head?
Can I actually blow up my house doing this?
It sounds like hyperbole, but the risks are grounded in physics. According to data from the Consumer Product Safety Commission, lithium-ion battery failures in consumer electronics are a leading cause of localized fires, often triggered by physical damage during DIY repairs. When you force a battery out of its housing—especially if it is glued in—you risk a “thermal runaway” event. This is why it is so critical to understand if your laptop battery is swelling before you even attempt to move it. If that battery looks like a “spicy pillow,” you aren’t just doing a repair; you’re handling a small, unstable bomb. I once saw a friend try to pry a swollen battery out with a metal ruler, and the resulting hiss of gas was enough to make us evacuate the room. We’re going to make sure that doesn’t happen to you by covering the prep work most people skip.
Setting the Stage for a Successful Teardown
First, clear your desk. You aren’t just making space for a laptop; you’re creating a surgical theater for your hardware. If you are working on high-end gaming laptops, you are dealing with sophisticated cooling systems and dense internal layouts that don’t forgive clutter. I learned this the hard way when I tried to keep track of thirteen tiny screws by lining them up on the edge of a coaster. My cat walked past, and I spent two hours on my hands and knees with a flashlight. Now, I never start without a magnetic tray and the $10 tool every laptop owner should keep in their desk: a plastic spudger. Using metal to pry open a case is like using a crowbar to open a jewelry box—you will leave permanent scars on the chassis.
Managing Those Tiny Screws Without Losing Your Mind
Modern laptops often use different screw lengths for the front and back of the baseplate. If you put a long screw back into a short hole, you can actually pierce the motherboard or the palm rest. This is a common pitfall when upgrading student laptops, which are often built with thinner plastics. I recommend drawing a rough diagram of your laptop on a piece of paper and taping each screw to its corresponding location on the drawing. This simple hack ensures that when you finally hunt down unbeatable laptop deals for replacement parts, the reassembly is as smooth as the teardown.
Ditch the Metal Tools and Ground Yourself
Static electricity is the invisible enemy. You might not feel the spark, but a single volt of discharge can fry a memory controller. Before you touch the internal board, ground yourself. If you don’t have an anti-static wrist strap, touch a grounded metal object—like a radiator or the metal casing of a plugged-in desktop—frequently. This is especially vital when handling business laptops for professionals, as their motherboards often feature complex security chips that are incredibly sensitive to voltage spikes. While you have the case open, it is also the perfect time to look for other issues; for instance, you should know how to spot a failing laptop hinge before it breaks the screen, as these often loosen up right next to the battery housing.
The Delicate Dance of Unplugging the Connector
The most stressful part of the process isn’t the screws; it’s the battery connector. These are often fragile plastic headers that feel like they are glued in. Use your plastic spudger to walk the connector out of its socket slowly, millimeter by millimeter. Never pull on the colored wires themselves. I once saw a DIYer snap the wires right out of the plastic housing on one of those student laptops that balance power and portability, turning a simple battery swap into a soldering nightmare. If the battery is held in with adhesive rather than screws, don’t use heat guns near the cells. Instead, use a few drops of high-percentage isopropyl alcohol to dissolve the glue, allowing the battery to lift away without force. This is safer than risking a puncture that could lead to a fire.
Let’s dig deeper into why simply following the spec sheet often leads to a bad purchase. Most people believe that an i7 processor in a $600 consumer machine is the same as an i7 in a $1,500 workstation. This is one of the most persistent myths in the tech world. In reality, why business laptops use different CPUs than consumer models comes down to sustained performance and security features like Intel vPro or AMD DASH. While a consumer chip is designed for ‘burst’ loads—like opening a web page—a professional machine is built to handle heavy, sustained workloads without thermal throttling. If you’ve ever wondered why your home machine stutters during a long video call while your office rig stays silent, that is the nuance you are paying for.
Stop Looking at the Spec Sheet and Start Looking at the Chassis
Everyone says to buy the fastest processor you can afford, but in my experience, the chassis and cooling assembly matter far more for the actual lifespan of the device. This is the ‘Oops’ factor many DIYers miss: they snag unbeatable laptop deals only to realize the thermal design is so poor it kills the SSD in two years. I’ve seen countless student laptops that balance power and portability on paper, but fail in the real world because their single-heat-pipe system can’t vent the heat of a modern browser. When you are looking at top business laptops for productivity in 2025 expert recommendations, you aren’t just paying for the name; you’re paying for a magnesium alloy frame and dual-fan setups that protect the motherboard from flexing and heat damage.
Why does my high-end gaming rig feel slower than my office workstation for real work?
It comes down to latency and background optimization. Gaming machines are tuned for high frame rates, but business laptops for professionals are tuned for stability. A study by Gartner on Total Cost of Ownership (TCO) suggests that while professional-grade hardware has a higher upfront cost, the downtime associated with consumer-grade failures makes them 20% more expensive over a three-year lifecycle. This is why I always tell people that why your next business laptop needs a user replaceable battery is about more than just convenience—it is about ensuring the machine doesn’t become e-waste the moment a single cell wears out. Most gaming laptops ignore this, prioritizing thinness over the ability to swap parts, which is why why most gaming laptops fail right after the warranty expires.
Before you commit to your next upgrade, check how to find official repair guides for your exact model. If the manufacturer doesn’t provide them, that’s a red flag that the device was built to be replaced, not repaired. Have you ever fallen into this trap of buying a high-spec machine only to have it fall apart physically within a year? Let me know in the comments. I’ve personally spent more on must-have laptop accessories to boost your work setup trying to ‘fix’ a bad laptop purchase than it would have cost to just buy the right machine the first time.
After years of tinkering, I’ve realized that a great laptop is only as good as the tools you use to maintain it. If you are still using a generic hardware store screwdriver, you are inviting stripped screws and a lot of frustration. I’ve transitioned to using a dedicated precision kit with ESD-safe bits because the fit is tighter and the risk of rounding out a tiny screw is almost zero. This is one of those must-have laptop accessories for a seamless setup that pays for itself the first time you don’t have to drill out a stuck fastener. Beyond just the driver, I swear by a set of nylon ‘spudgers’ and a thin metal prying tool like the ‘Jimmy’ for those stubborn adhesive bonds. It’s literally the tool every laptop owner should keep in their desk if they ever plan on looking inside their chassis. 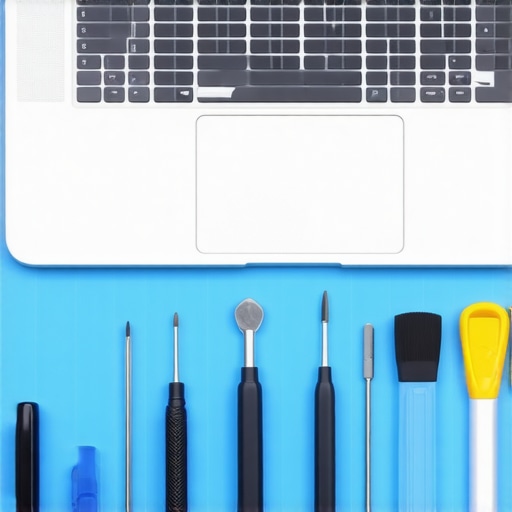
How do I maintain peak performance for five years or more?
The secret isn’t just software updates; it’s physical hygiene. Fans are essentially vacuum cleaners for your desk. If you use your machine on a bed, you are clogging those fins with lint and hair. I recommend a bi-annual cleaning where you actually hold the fan blades still with a toothpick to prevent back-EMF (electromotive force) while you blow out the dust with compressed air. If the noise doesn’t go away or you notice your clock speeds dropping, you need to know how to replace your own laptop fan in under 20 minutes. It’s a surprisingly cheap part that can save a $2,000 motherboard from a slow, heat-induced death.
Thermal Paste is the Secret Performance Hack
Once you have the case open, you’ll often find that factory-applied thermal paste looks like a dried-out piece of chalk. This is the primary reason for how to stop your gaming laptop from thermal throttling in summer. I personally use Arctic MX-6 because it’s thicker and resists the ‘pump-out effect’—a phenomenon where heat expansion cycles literally push the paste out from between the die and the heatsink. According to testing by Gamers Nexus, a professional hardware benchmarking site, the pump-out effect is one of the most common reasons high-performance machines lose their edge. Learning how to choose the right thermal paste for your machine can lower your operating temperatures by 10 or 15 degrees Celsius instantly.
Long-Term Reliability for Students and Professionals
For those using student laptops that balance power and portability, the battery is your biggest long-term headache. To make it last, use the manufacturer’s battery management software to cap the charge at 80% if you are mostly plugged in. This prevents the chemical degradation that happens when a battery sits at 100% voltage for weeks on end. If you eventually decide to upgrade, don’t just throw the old machine away. There are clever ways on how to turn an old student laptop into a functional home server, giving it a second life as a private cloud or a media center. I predict that as the ‘Right to Repair’ movement gains more legal ground, we’ll see a future where every laptop is as modular as a desktop PC. Even if your keyboard gets ruined, knowing the best way to clean a sticky keyboard without breaking the keys will be a skill of the past as we move toward snap-in modules. For now, take one advanced step this week: download a battery health monitor and check your cycle count. It’s the first step in moving from a ‘user’ to an ‘owner’ of your technology.
The Expensive Lessons My Fried Motherboard Taught Me
Looking back at my first disastrous attempt to fix a device, the biggest ‘lightbulb moment’ wasn’t about the battery itself—it was about the ego. I assumed that because I could navigate a software menu, I understood the physical architecture of business laptops for professionals. I was wrong. The first lesson is that patience is a physical tool. If a ribbon cable doesn’t slide out, you aren’t being too gentle; you’ve missed a locking tab. Second, I learned that ‘cheap’ is often the most expensive choice you can make. Buying a third-party, unbranded charger or battery might save you $40 today, but knowing how to find a replacement charger that won’t fry your board is what actually saves your $1,000 investment. Finally, I realized that modern hardware is a puzzle designed by engineers, not a box to be pried open. If you have to use force, you are doing it wrong.
My Non-Negotiable Kit for Hardware Longevity
If you want to move beyond being a casual user and start maintaining your gear like a pro, you need to curate a small but high-quality selection of must-have laptop accessories to boost your work setup. I personally never open a chassis without a magnetic project mat to keep my screws organized by length; it’s the only way to avoid the dreaded ‘screw through the palm rest’ disaster. I also highly recommend keeping a tube of high-end compound on hand, as learning how to choose the right thermal paste for your machine is the single best way to drop temperatures in older gaming laptops. Lastly, don’t underestimate the power of a simple nylon spudger; it is truly the tool every laptop owner should keep in their desk to prevent scratching those delicate internal connectors.
Take the Fear Out of the Screwdriver
It is easy to get paralyzed by the fear of breaking something, but remember that even the most complex student laptops that balance power and portability are meant to be serviced. By taking the time to ground yourself and use the right tools, you aren’t just saving money on repairs; you are extending the lifecycle of your technology and keeping e-waste out of landfills. The next time you see unbeatable laptop deals, you can shop with the confidence of knowing that you have the skills to keep that machine running at peak performance for years to come. Don’t be afraid to look under the hood—just make sure you’re prepared when you do. Have you ever accidentally snapped a connector or lost a tiny screw inside your laptop case? Let me know your DIY horror stories or victories in the comments below!