
I still remember the feeling of absolute triumph when I finally saved up enough cash to unbox one of those shiny new gaming laptops. I booted it up, loaded my favorite game, and waited for my mind to be blown. Instead, I got stuttering. It felt sluggish, almost like my old budget machine. I spent three days tweaking settings, reinstalling drivers, and pulling my hair out before I realized my incredibly stupid mistake: my RAM was running at its basic, sluggish default speed of 2133MHz instead of its advertised 3200MHz speed. I had paid for premium performance but was actively bottlenecking my own system because I assumed everything just worked out of the box.
The Invisible Performance Drain in Your Laptop
It is a dirty little secret in the PC world that brand-new student laptops and high-end rigs alike often ship with their memory speeds severely throttled. When you buy RAM, the speed printed on the box is technically an overclock profile. Out of the box, your motherboard defaults to a safe, slow standard speed. If you do not actively go in and enable the correct profile, you are leaving free performance on the table. This is especially true if you rely on laptops with two RAM slots to handle heavy multitasking; running them at half-speed completely defeats the purpose of upgrading.
Is this performance tweak actually worth the hassle?
You might wonder if a few hundred megahertz really make a difference in daily use. According to hardware testing experts at GamersNexus, slow memory speeds can degrade your minimum frame rates in modern games by up to 15 percent, causing those annoying, sudden micro-stutters. Whether you are compiling code on business laptops or trying to stream video, slow RAM slows down the rate at which your processor communicates with the rest of your system. It is like driving a sports car but never shifting past third gear. Have you ever noticed your brand-new machine feeling strangely sluggish right out of the box, even though the specs say it should be a beast? Tell me about your experience in the comments below, because we have all been there.
Unlocking the Hidden Speed in Your BIOS
Getting your RAM to run at its advertised speed requires a quick trip into your system’s BIOS. Think of your BIOS as the ultimate control room of your machine; if you do not change the settings here, your operating system will never even know your hardware is capable of running faster. When I first tried to fix my sluggish system, I was terrified of breaking something. I had bought a premium rig from the latest laptop deals and assumed entering the BIOS would void my warranty. In reality, it takes less than two minutes and is completely safe if you know exactly what to look for.
Step 1: Accessing the Motherboard Settings
First, shut down your machine completely. As you press the power button to boot it back up, immediately start tapping the utility key for your specific motherboard. For most modern gaming laptops, this is going to be the Delete key or the F2 key. If you are configuring hardware on older business laptops, you might need to try F10 or F12. If you miss the window and see the Windows loading screen, simply restart and try again. You will know you succeeded when a complex, technical menu replacing your usual desktop interface appears.

Step 2: Activating XMP or DOCP Profiles
Once you are inside the BIOS, look for the ‘Advanced Mode’ toggle, which is usually assigned to F7. From here, navigate to the overclocking, memory, or AI Tweaker menu. You are looking for a setting called XMP (Extreme Memory Profile) on Intel systems, or DOCP (Direct Overclock Profile) on AMD machines. By default, this is set to ‘Disabled’ or ‘Auto’. Click the dropdown menu and select ‘Profile 1’. This tells your motherboard to read the exact speed, timings, and voltage written on your RAM chips instead of guessing. I once rushed this step on a friend’s machine, forgot to verify the profile details, and the system would not boot because the default voltage was too low. If this happens to you, do not panic; just clear the CMOS or restart to safe defaults and try again.
Step 3: Save Changes and Verify the Results
After selecting the profile, navigate to the ‘Exit’ tab and choose ‘Save Changes and Reset’. Your laptop will reboot. To make sure the fix actually worked, do not rely on your gut feeling. Open your Windows Task Manager, click on the ‘Performance’ tab, and select ‘Memory’. Under the graph, look at the speed listed. If you see your advertised speed, such as 3200MHz or 3600MHz, instead of 2133MHz, you have successfully unlocked your hardware. If you are setting up a workspace with premium laptop accessories, ensuring your host machine is fully optimized first makes every peripheral run that much smoother.
Now that you know how to navigate the BIOS and activate your memory profiles, let’s dig deeper into the actual nuances of system memory. There is a massive misconception floating around hardware forums that enabling XMP or DOCP is a magic bullet that solves every bottleneck. Many believe that once the profile is active, the job is done. In my experience, relying blindly on automated profiles without double-checking the secondary timings or voltage limits can lead to silent stability issues that ruin your productivity or gaming sessions.
Why do automated memory profiles fail on high-end systems?
The problem lies in how motherboards interpret these pre-configured profiles. According to a detailed hardware analysis by GamersNexus, motherboards often apply excessive system agent voltages when left on “Auto” alongside an active XMP profile. This overvolting can lead to increased thermal strain on your CPU controller, which ironically causes micro-stutters and eventual system crashes. If you have scouted the best laptop deals for a high-performance machine, you might actually be degrading your hardware over time by not manually checking these voltage offsets.
The Dual-Channel Trap and Single-Stick Throttling
Another common myth is that memory capacity matters more than memory configuration. People often buy a system boasting 16GB of RAM, assuming it will fly, without realizing that a single 16GB stick operates in single-channel mode, which effectively cuts memory bandwidth in half. When configuring student laptops or machines meant for heavy multitasking, always look for dual-channel configurations. This is exactly why we always choose laptops with two RAM slots. It allows you to populate both channels, doubling the theoretical bandwidth and preventing severe performance drops during intensive tasks.
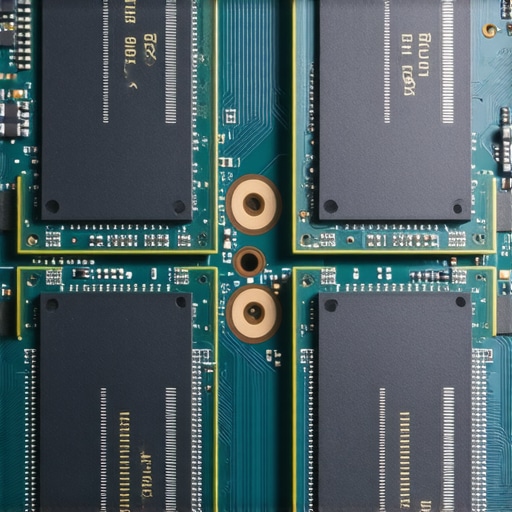
Avoid the trap of mixing different RAM brands or speeds even if they fit in the slots. Your system will always downclock both sticks to match the slowest speed and loosest timings of the inferior stick. Worse, it can introduce serious memory controller instability. If you are customizing gaming laptops or upgrading business laptops, buy a matched, factory-tested kit rather than piecing together individual sticks. Have you ever fallen into this trap or noticed your memory running in single-channel mode? Let me know in the comments below, and let’s get your rig running at full speed.
I used to believe that once you flipped the XMP switch in the BIOS, your job was done forever. That naive assumption cost me dearly during a major project deadline when my system suddenly threw a blue screen of death. The truth is, high-performance memory configurations require active, long-term maintenance. Over time, cumulative Windows updates, driver conflicts, and thermal wear can silently degrade your memory stability. To prevent these unexpected crashes, I rely on a strict testing regimen and specialized diagnostic tools that keep my hardware running at peak efficiency.
How do I maintain my laptop’s memory stability over time?
To keep my system rock-solid, I run a dedicated memory diagnostic cycle every six months or immediately after any major OS update. Windows Memory Diagnostic is a decent quick check, but it misses subtle timing errors. Instead, I use MemTest86 by PassMark. I flash it onto a dedicated bootable USB drive, restart my laptop, and run it directly from boot for at least four passes. It is a time-consuming process that takes several hours, but it is the only way to guarantee absolute hardware stability. If you are hunting down premium laptop deals for work or play, running this test on day one is crucial to ensuring you did not receive a faulty unit.
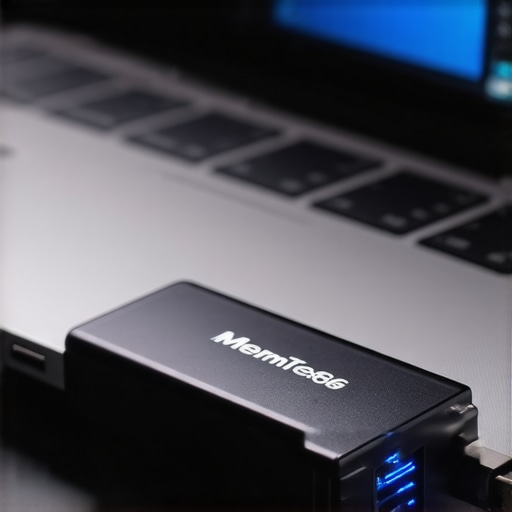
Beyond software diagnostics, physical heat is the biggest threat to your memory’s lifespan. Laptops pack components incredibly close together, and high-speed RAM running at increased voltages generates considerable ambient heat. While some users buy bulky external cooling accessories to solve this, I found that most laptop cooling pads are a waste of money. Instead, keeping your internal fans free of debris is far more effective. I use a simple can of compressed air and a static-free brush to clean my vents quarterly, ensuring that cool air always circulates over the motherboard’s memory traces.
The Future of Laptop Memory and On-Board Performance
Looking ahead, the landscape of laptop memory is shifting rapidly. We are already seeing the transition from traditional SO-DIMM slots to LPCAMM2 (Low Power Compression Attached Memory Module) technology. This new standard promises the high speeds and power efficiency of soldered LPDDR5X memory but with the massive benefit of being fully modular and user-replaceable. This means future gaming laptops and ultra-thin business laptops won’t force you to choose between thin profiles and upgradability. According to technical documentation from Micron Technology, LPCAMM2 modules can reduce power consumption by up to 61% compared to standard DDR5 SO-DIMMs while saving critical motherboard space.
As these new memory technologies become standard, optimizing your system settings will only become more critical. If you want to experience an immediate boost in your system’s responsiveness today, I highly encourage you to try one advanced step: download MemTest86, create your bootable USB, and verify that your active XMP or DOCP profile is not throwing silent errors under heavy load. It is the ultimate test of hardware health.
I used to believe that once you flipped the XMP switch in the BIOS, your job was done forever. That naive assumption cost me dearly during a major project deadline when my system suddenly threw a blue screen of death. The truth is, high-performance memory configurations require active, long-term maintenance. Over time, cumulative Windows updates, driver conflicts, and thermal wear can silently degrade your memory stability. To prevent these unexpected crashes, I rely on a strict testing regimen and specialized diagnostic tools that keep my hardware running at peak efficiency.
How do I maintain my laptop’s memory stability over time?
To keep my system rock-solid, I run a dedicated memory diagnostic cycle every six months or immediately after any major OS update. Windows Memory Diagnostic is a decent quick check, but it misses subtle timing errors. Instead, I use MemTest86 by PassMark. I flash it onto a dedicated bootable USB drive, restart my laptop, and run it directly from boot for at least four passes. It is a time-consuming process that takes several hours, but it is the only way to guarantee absolute hardware stability. If you are hunting down premium laptop deals for work or play, running this test on day one is crucial to ensuring you did not receive a faulty unit.
Beyond software diagnostics, physical heat is the biggest threat to your memory’s lifespan. Laptops pack components incredibly close together, and high-speed RAM running at increased voltages generates considerable ambient heat. While some users buy bulky external cooling accessories to solve this, I found that most laptop cooling pads are a waste of money. Instead, keeping your internal fans free of debris is far more effective. I use a simple can of compressed air and a static-free brush to clean my vents quarterly, ensuring that cool air always circulates over the motherboard’s memory traces.
The Future of Laptop Memory and On-Board Performance
Looking ahead, the landscape of laptop memory is shifting rapidly. We are already seeing the transition from traditional SO-DIMM slots to LPCAMM2 (Low Power Compression Attached Memory Module) technology. This new standard promises the high speeds and power efficiency of soldered LPDDR5X memory but with the massive benefit of being fully modular and user-replaceable. This means future gaming laptops and ultra-thin business laptops won’t force you to choose between thin profiles and upgradability. According to technical documentation from Micron Technology, LPCAMM2 modules can reduce power consumption by up to 61% compared to standard DDR5 SO-DIMMs while saving critical motherboard space.
As these new memory technologies become standard, optimizing your system settings will only become more critical. If you want to experience an immediate boost in your system’s responsiveness today, I highly encourage you to try one advanced step: download MemTest86, create your bootable USB, and verify that your active XMP or DOCP profile is not throwing silent errors under heavy load. It is the ultimate test of hardware health.
What the Spec Sheets Hide About Laptop Memory
Through years of troubleshooting performance bottlenecks on everything from ultra-budget student laptops to elite workstation rigs, I have uncovered a few hard truths that standard review sites rarely discuss. First, memory speed is entirely bound by your processor’s integrated memory controller; buying 4000MHz RAM is pointless if your CPU can only handle 3200MHz. Second, heat acts as a silent executioner for tight memory timings. When your laptop heats up during heavy loads, the memory controller will often dynamically loosen timings to prevent crashes, which slows down your actual system speed without your knowledge. Lastly, do not rely on pre-applied thermal pads on RAM shielding as they often dry out and fail within eighteen months, requiring manual replacement to sustain those top-tier speeds.
My Essential Diagnostics Toolkit
To truly master your system hardware, you need a reliable suite of diagnostic utilities. I personally depend on three specific tools to evaluate memory integrity on my machines. I use ZenTimings on AMD-based systems to review secondary and tertiary timings that the Windows OS usually hides. For stress-testing real-world stability, I run Karisma HCI MemTest directly inside Windows to push the system agent voltage to its limit. Finally, I monitor real-time temperature fluctuations under load using HWiNFO64, which helps me identify if my memory is running too hot before it triggers a system crash. Having these tools ready is just as vital as securing the best laptop accessories for a clean desktop setup.
Take Control of Your System Performance Today
Optimizing your RAM is not just about chasing benchmarks or securing boasting rights in online forums. It is about demanding and achieving the exact level of performance that you already paid for when browsing through those enticing laptop deals. Whether you are using your machine to render 3D models, compile code, or dominate competitive gaming lobbies, ensuring your memory runs in a dual-channel configuration with the correct profile active is the easiest way to elevate your computer’s day-to-day speed. Go ahead, restart your machine, open up that BIOS, and let your hardware run at its true potential.
Have you checked your memory speeds in the Windows Task Manager today, or did you find out that your RAM was running at default speeds all along? Let me know about your diagnostic results in the comments below!