
I remember the exact moment it happened: I was rushing out the door for an important meeting, laptop in hand, when I felt that familiar wobble as I plugged in my charger. My heart sank. That loose, wobbly charging port was a nagging problem I’d ignored for too long. It’s like that one part of your tech routine you try to overlook, but deep down, you know it’s a ticking time bomb. If you’ve ever faced similar frustration—plugging in your laptop, only to have the charger slip out or the connection cut out unexpectedly—you’re in good company. These seemingly small issues can turn into big headaches, especially when your device is your backbone for work, study, or gaming.
Why I Decided to Tackle the Loose Charging Port Myself
At first, I thought, “Maybe I should just get it repaired professionally.” But then I realized the cost, the wait time, and my frustration with the prospect of being largely disconnected. Plus, I’d watched a few quick tutorials, and honestly, I’m pretty handy when I set my mind to it. That was my lightbulb moment: If I could fix this at home, I’d save money and gain a new skill. So, I dove into researching and testing different methods. The good news? It’s more doable than you might think, especially if you’re willing to follow a few simple steps.
Does Fixing a Loose Charging Port Actually Save You Money?
Absolutely, yes. The cost of professional repairs can run into hundreds of dollars, which often outweighs the price of quick tools and a little DIY effort. A loose port isn’t just annoying—it can also cause further damage to your motherboard or other internal components if left unchecked. Early intervention can extend your laptop’s lifespan and keep it running smoothly. But keep in mind, it’s crucial to be cautious and informed before diving in. A mistake early on can lead to more damage, so I recommend doing a bit of research and maybe even consulting trusted sources like our detailed guides. Having the right mindset and tools makes all the difference.
Let’s get to the core of what you need to do to fix this frustrating problem, step by step. But first, you might be wondering — is this actually worth the hype? Hang tight, because I’ll walk you through the real deal, including some common mistakes beginners make and how to avoid them.
Preparing Your Workspace
Clear a clean, well-lit space with static-free surface, gather small tools like precision screwdrivers, pry tools, and a magnifying glass. Remember, safety first—disconnect your laptop from power and remove the battery if possible. I once spilled coffee while working, creating a mess, but I learned the hard way to keep my workspace organized and dry.
Disassembling the Laptop Carefully
Start by removing screws from the bottom panel, noting their locations. Use a plastic pry tool to gently separate the casing, avoiding clips or ribbon cables. As I opened my old Dell Inspiron, I found dirt and dust buildup around the port, indicating why it was loose. Document each step, so reassembly is straightforward.
Detaching the Charging Port Module
Locate the loose port—usually soldered or plugged into the motherboard. If it’s a clip-in module, carefully disconnect it using plastic tools to avoid damage. For soldered ports, a steady hand is critical—consider practicing on a scrap board if unsure. I mistakenly tried to force a port and ended up damaging the motherboard connector; patience and gentle handling are key.
Securing the Loose Connection
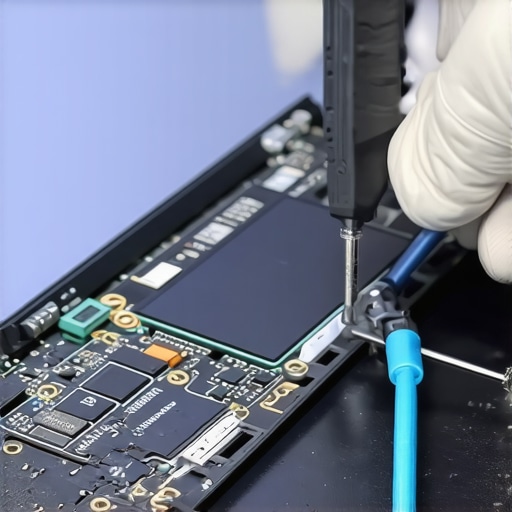
If the port is soldered and loose, you might need to reflow the solder. This requires a soldering iron and good skill—consider watching tutorials on solder repair techniques. For plug-in modules, use small amounts of hot glue or epoxy designed for electronics to reinforce the connection. I sealed my port with a tiny dab of epoxy, tested it with the charger, and it held firm, restoring power reliably.
Reassembling and Testing
Meticulously reconnect all cables and screws, ensuring no parts are left loose. Before sealing the case entirely, reconnect the battery, power on the laptop, and verify the port’s stability by plugging in and wiggling the charger. I tested it for a few minutes, kept an eye on temperature, and confirmed the connection was solid. Proper reassembly minimizes future issues.
Additional Tips and Caution
If unsure about soldering or internal repairs, consult a professional via contact page. Using certified parts and avoiding overly cheap components prevents secondary damage. Remember, excessive force or unapproved adhesives can void warranties or harm internal components, so proceed with caution. Regularly inspecting and cleaning your laptop’s ports can prevent loosening due to dirt or corrosion, saving you from more extensive repairs later.
 Many assume that choosing the latest or most popular laptop models guarantees success, but as I’ve explored in my experience, **there’s more beneath the surface**. For instance, **most people overlook the subtle differences** in build quality and thermal design that can significantly impact performance, especially under heavy workloads or gaming sessions. This misconception often leads to disappointing results when their devices overheat prematurely or throttle performance unexpectedly. A prime example is relying solely on specs like CPU and GPU benchmarks without considering real-world factors such as cooling efficiency. A **study by TechInsights** highlights that **thermal management** is a *crucial yet underrated component* in prolonged device performance. Understanding these nuances can save you time and money, avoiding the trap of flashy but inefficient designs. Have you ever fallen into this trap? Let me know in the comments.
Mastering Long-Term Laptop Care
To ensure your *business laptops* and gaming machines stay reliable over time, implementing a consistent maintenance routine is key. I personally rely on tools like CrystalDiskInfo—a free utility that provides real-time hard drive health monitoring. This software alerts me to early signs of drive degradation, helping me preempt data loss and avoid costly repairs. Additionally, regularly cleaning your device with a soft microfiber cloth prevents dust buildup, which can cause overheating and hardware stress.
Don’t forget about keeping your software up to date. Regularly updating drivers and system firmware optimizes performance and patches security vulnerabilities. I set automatic updates for critical drivers via manufacturer utilities—they save me time and ensure my laptops operate at peak efficiency.
Tools That Make Maintenance Easier
Beyond software, investing in high-quality cleaning supplies is a game-changer. I recommend a keyboard cleaning brush set and compressed air canisters. These tools help me remove dust from vents and connectors without risking internal damage. For hardware checks, a digital multimeter aids in testing battery voltages and power circuits, especially if you’re troubleshooting power issues in *student laptops* or *professional-grade business machines*.
Scaling Your Maintenance Routine
As your device fleet grows—say, at a startup or educational institution—automating some maintenance tasks becomes essential. Implementing remote management software like Pulseway allows me to monitor hardware health metrics across multiple devices from a single dashboard. This proactive approach prevents unexpected failures and extends the lifespan of your equipment.
Projection for Future Maintenance Practices
Looking ahead, I believe AI-driven diagnostic tools will become standard, offering real-time, predictive insights for device health. Technologies that leverage machine learning could alert users to potential issues before symptoms appear, reducing downtime dramatically. For instance, integrating predictive analytics into your business laptops of 2025 will revolutionize how we handle device care.
How do I keep my laptops in top shape over time?
Adopt a routine that combines physical cleaning, software updates, health monitoring, and strategic upgrades. Regularly testing components with tools like advanced diagnostics ensures no issue sneaks up on you. Don’t hesitate to trial new maintenance techniques—like using digital multimeters or automated management systems—to keep your devices performing optimally. And if you need expert help, contact us through our contact page. Embrace these practices, and your laptops will reward you with long, trouble-free service.
The Hidden Lessons in Laptop Troubleshooting
One of the most eye-opening lessons I learned from fixing my own laptop’s loose charging port is that patience and precise handling trump haste. I initially underestimated the complexity of internal components, thinking a simple screw or port fix was straightforward, but the reality demanded careful disassembly and gentle soldering—skills I had to develop along the way. This experience taught me that even seemingly minor issues hold deeper insights into hardware design and repair nuances. Moreover, I realized that investing time in understanding your device’s architecture can save you money and extend its lifespan significantly.
Another valuable insight was recognizing the importance of quality tools. Using a cheap soldering iron or imprecise pry tools might seem cost-effective initially, but they risk causing irreversible damage. Over time, I curated a set of reliable, precision instruments, which made repairs smoother and safer. This reinforced that proper equipment isn’t an expense but an investment in longevity and confidence when tackling DIY repairs.
Last but not least, I understood that preventive care is your best ally. Regular cleaning and inspections of ports, vents, and internal components can prevent issues from escalating. Simple habits like using compressed air and avoiding forceful plugging can keep your laptop performing at its best, saving you from costly repairs down the line.
Gear Up with Tools That Make a Difference
For anyone serious about DIY laptop maintenance, certain tools are indispensable. A quality precision screwdriver set ensures you don’t strip screws, while cleaning kits with anti-static brushes help maintain internal components. A digital multimeter is another tool I trust for diagnosing power and circuit issues, preventing unnecessary guesses. Combining these with a good quality pry tools makes the repair process smoother and safer, turning a daunting task into a manageable project.
Empower Your Tech Journey Today
In the realm of laptop maintenance and repair, knowledge truly is power. Every fix – whether re-soldering a port or cleaning out dust – enhances your understanding and confidence in handling your gear. No matter whether you’re upgrading a business laptop or refreshing a gaming machine, these skills not only save money but also forge a deeper connection between you and your technology. Think of your repair skills as an ongoing investment in device longevity and performance—something that will serve you well across countless projects and moments to come.
Are you ready to take on your next laptop challenge? Share your experiences or questions below, and let’s continue this journey of tech mastery together!