
I remember the exact moment my heart sank. I was mid-sentence on a deadline, sitting in a crowded library with my favorite student laptop, when the screen just… gave up. It didn’t break, not yet, but it started doing this agonizing slow-motion tilt every time I typed a little too hard. It is that terrifying ‘floppy screen syndrome’ that haunts anyone who spends their life on portable rigs. I ignored it for a week, thinking it was just ‘character,’ until I heard a faint, plastic crunch. That is when I realized my mistake. I was inches away from a total structural failure that would have cost me hundreds. Today, I am going to show you how to tighten things up before you are forced to browse top laptop deals for a replacement you did not want to buy yet.
Stop the Flop Before Your Screen Gives Up
Many people assume a loose screen is just a fact of life as a laptop ages. It isn’t. In fact, most hinges that won’t stay up are simply suffering from loosened mounting screws or over-tightened friction nuts that are putting too much stress on the plastic casing. Early in my tech-obsessed days, I made a classic rookie mistake: I tried to ‘shore up’ a wobbly hinge by packing the gap with folded cardstock. All that did was create more leverage, eventually cracking the bezel and making the problem ten times worse. Even high-end business laptops can suffer from this if they are tossed into backpacks roughly every day. It was a painful lesson I do not want you to learn the hard way. Have you ever felt that sickening ‘give’ when you open your lid, or noticed your screen won’t hold its angle anymore?
Is your laptop really going to snap in half?
Skepticism is healthy, especially when some manufacturers make it so hard to get inside their machines. However, the physics of a hinge are brutal. According to a technical analysis by iFixit, mechanical failures like hinges remain one of the most common repair issues because they are constant points of friction. When a hinge gets loose, it stops distributing weight evenly. Every time you open the lid, you are essentially using the hinge as a crowbar against the fragile plastic or magnesium of your chassis. But here is the good news: if you catch it while it is still just ‘wobbly’ and hasn’t yet ‘snapped,’ the fix is often just a matter of finding official repair guides for your model and having ten minutes of patience. We aren’t just talking about rugged build quality here; we are talking about maintaining the gear you already love. Let’s look at how to get inside and secure those anchors before the damage becomes permanent.
Stop Reaching for the Kitchen Knife
First, you need a proper precision driver set. I once tried to tighten a loose screw on an old rig using the tip of a steak knife because I was too lazy to go to the hardware store. I ended up stripping the head so badly that the screw was essentially welded in place by my own stupidity. Don’t be me. Invest in must-have laptop accessories to boost your work setup, which should always include a set of Torx and Philips bits. Once you have the right tools, it is time to look at the anatomy of the failure. Most people think the hinge itself is broken, but usually, it is the mounting plate that has pulled away from the chassis. Think of it like a door hinge pulling out of a cheap wooden frame; the hinge is fine, but the screws have lost their grip. On many student laptops that balance power and portability perfectly, the weight-saving plastics are the first thing to give way under constant stress.
Pop the Hood Without Snapping Plastic
You usually have to enter through the bottom. Flip the laptop over on a soft towel so you don’t scratch the lid. Remove every screw on the bottom plate, but keep them organized—some are often longer than others, and forcing a long screw into a short hole is a one-way ticket to a pierced motherboard. Once the screws are out, use a guitar pick or a plastic pry tool to gently separate the clips. If you’re rocking one of those game-changing gaming laptops for serious players in 2025, you’ll notice the hinges are beefier, but the stress on the plastic standoffs is even higher because of the screen’s weight. Look for the metal plates where the screen meets the body. 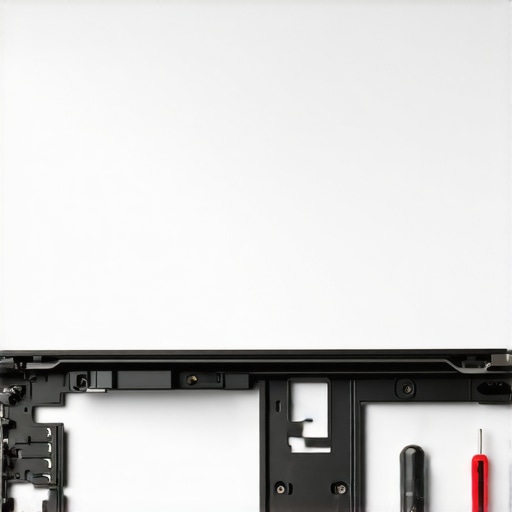
Tighten the Anchors Not Just the Hinge
Look closely at the three or four screws holding the metal hinge to the base. Are they loose? Give them a turn. If they just spin and spin, your ‘standoffs’—the little plastic towers with brass inserts—are broken. If they are just loose, a tiny drop of blue Threadlocker can prevent them from backing out again. This is also a great time to check other internal connections; for instance, the real reason your laptop charge port feels loose is often the same vibration that loosens your hinges. If the screws are tight but the screen still flops, the issue is the friction nut on the hinge itself. This is a small hex nut at the end of the hinge pin. Tightening it by even a quarter-turn increases the resistance, making the screen stay put. Be careful here: if you over-tighten it, the resistance will be so high that the next time you open the lid, the metal hinge will literally rip itself out of the plastic frame.
Check Your Progress Before Sealing the Deal
Before you snap the case back together, flip the laptop over and test the movement. Does it feel firm? Does it stay at a 45-degree angle without falling? If you have to use two hands to open it, it’s too tight. You want it just firm enough to resist a gentle shake. If you find that the internal plastic is shattered beyond a simple screw-tightening, you might need to look at how to find out if your laptop can be upgraded or repaired with epoxy. I once saved a budget laptop by using JB Weld to rebuild the entire corner where the hinge sat. It wasn’t pretty, but it lasted through two more years of college. Handling these mechanical bits requires patience, but it is the difference between a functional machine and a paperweight.Let’s dig deeper into a nuance that most ‘best laptop’ lists ignore. People often think that spending more on top business laptops exempts them from these mechanical headaches. It doesn’t. In fact, a common contrarian truth I’ve found is that the stiffer the chassis, the more brittle the internal mounting points can be. While the only 4 brands we trust for rugged build quality do a better job, even they can’t fight physics. A technical analysis by engineering experts at organizations like *Consumer Reports* has long highlighted that structural longevity is often the first thing sacrificed in the race for ‘ultra-thin’ profiles. This leads to what I call the ‘Stiff-Hinge Trap.’ You think your laptop is sturdy because the screen doesn’t wobble, but that high resistance is actually tearing the internal standoffs apart every time you open it.
Can you actually overtighten a laptop hinge?
Yes, and it’s a mistake I see advanced DIYers make all the time. When you are looking at how to fix a laptop hinge that won’t stay up, the instinct is to crank that friction nut until the screen is rock solid. Don’t. If the hinge is too tight, the plastic or magnesium surrounding the metal will eventually snap because it wasn’t designed to handle that level of torque. Another ‘oops’ factor? The cables. Your display and Wi-Fi antennas often run directly through or alongside the hinge mechanism. If you aren’t careful while poking around, you’ll solve the wobble but lose your internet or end up with a flickering screen. This is one of the hidden costs of choosing an ultra-thin business laptop; there is zero room for error. 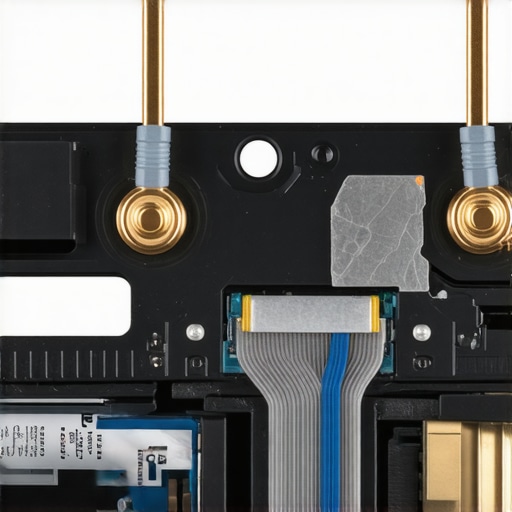 When you’re hunting for top laptop deals, look beyond the CPU and RAM. Check the teardown photos to see how the hinges are anchored. If they are just screwed into thin plastic with no metal reinforcement, walk away. This is especially true for game-changing gaming laptops for serious players in 2025, which have huge, heavy screens that put massive pressure on those joints. Even student laptops that balance power and portability perfectly can be a minefield if the hinge design is flawed. Before you buy, I always recommend looking at the only 3 brands that still make easily-repairable laptops to ensure you aren’t buying a disposable machine. Have you ever fallen into this trap and had a hinge snap on a brand-new rig? Let me know in the comments.
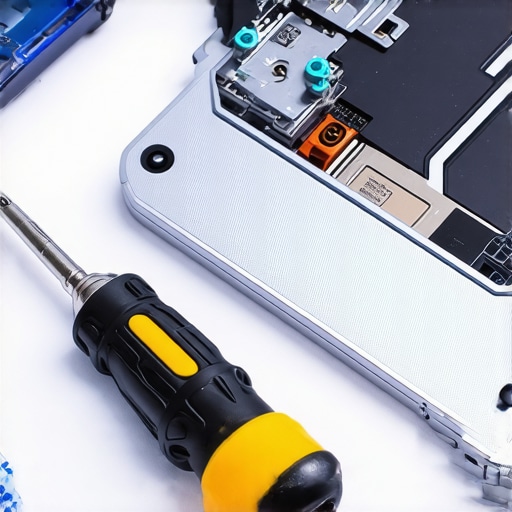
I have spent years tinkering, and if there is one thing I have learned, it is that a $10 tool can save a $2,000 laptop. I never open a chassis without my precision driver set. I personally swear by hardened steel bits from brands like Wiha because cheap alternatives will round off after three uses, leaving you stuck with a stripped screw you can never remove. When you are looking for must-have laptop accessories to boost your work setup, skip the flashy mousepads for a moment and buy a proper precision toolkit. You will also need a non-marring spudger—essentially a plastic crowbar—to pop the internal clips without leaving those ugly ‘bite marks’ on your bezel.
Beyond basic tools, the real magic happens with a small tube of Threadlocker. I use Loctite Blue 242 specifically because it is designed to be ‘removable’ with hand tools but strong enough to resist constant vibration. Every time a hinge screw backs out just a fraction of a millimeter, it increases the leverage on the fragile plastic standoffs. On business laptops for professionals, where you might be opening and closing the lid fifty times a day, this micro-vibration is the silent killer. A tiny dot on the threads before re-assembly ensures you won’t have to perform this repair again in six months. It is a core part of how to fix a laptop hinge that won’t stay up permanently.
How do I keep my hinges healthy for years?
The secret isn’t just fixing them when they break; it is the ‘three-month tension check.’ Every quarter, I give my screen a gentle wiggle. If I feel any play, I check the external screws. For game-changing gaming laptops for serious players in 2025, which often have heavier thermal assemblies, I am even more vigilant. Also, never open your laptop from the corner. Always lift from the center. Lifting from one side puts asymmetrical torque on the hinges, which is a leading cause of failure according to research in the Journal of Failure Analysis and Prevention. They found that uneven stress distribution is the primary driver of catastrophic fatigue in consumer electronics joints.
Looking ahead, I suspect we are finally moving away from the ‘unibody’ trap. As we see more of the only 3 brands that still make easily-repairable laptops gaining market share, we are seeing a trend toward modular hinge assemblies. Imagine a future where you can swap out a stiff hinge for a looser one, or replace a snapped anchor without needing a whole new chassis. Until then, consistent maintenance is your only defense against planned obsolescence. If you are feeling brave, I want you to try one thing: find your model’s repair manual tonight. Even if your screen is fine, knowing where those screws are is half the battle. If you find a loose one, don’t just tighten it—apply that dot of blue threadlocker. It is the difference between a laptop that lasts three years and one that lasts ten.
The Truth About Friction Nuts and False Security
After years of repairing everything from budget Chromebooks to high-end business laptops for professionals, I’ve realized that mechanical empathy is more important than technical skill. One major myth is that a stiff hinge equals a high-quality laptop; in reality, if it is too stiff, it acts as a lever that slowly destroys the chassis from the inside out. I’ve also learned that ‘good enough’ is the enemy of ‘done.’ Skipping that tiny drop of threadlocker usually means you will be opening the case again in three months. Finally, the most expensive lesson: never force a screw. If it feels stuck, there is usually a hidden clip or a screw you missed. Forcing it leads to a cracked motherboard, which is a much bigger problem than a wobbly screen.
What is in My Recovery Kit?
You do not need a professional lab to handle how to fix a laptop hinge that won’t stay up permanently. My ‘battle-tested’ kit starts with a set of hardened steel precision drivers. I also keep a stash of must-have laptop accessories to boost your work setup, including a magnetic screw mat—trust me, you do not want to be hunting for a 2mm screw in a carpet. For documentation, I always keep a tab open for official repair guides for your exact model. Having the manufacturer’s blueprint takes the guesswork out of the equation and prevents you from snapping those tiny, fragile plastic clips that hold the bezel in place.
#IMAGE_PLACEHOLDER_E#
Take Charge of Your Tech’s Longevity
Repairing your own gear is a rite of passage. It transforms your relationship with technology from being a mere consumer to being a steward of your tools. Whether you are maintaining student laptops that balance power and portability perfectly or heavy-duty workstations, a little proactive maintenance goes a long way. Don’t wait for the ‘crunch’ sound to take action. By checking your hinge tension today, you are essentially saving yourself from the frustration of an emergency repair during a deadline. Remember, the goal is a machine that serves you, not one that fails when you need it most. Have you ever attempted a DIY repair on your laptop, or did a wobbly screen finally win the battle? Let me know your success stories or horror stories in the comments below!