
Have you ever been in the middle of an important video call only to realize your built-in laptop camera looks fuzzy or outdated? I remember one hectic work-from-home day when my webcam suddenly decided to freeze, leaving me frantically searching for a solution. That moment felt like a wake-up call—why rely solely on a camera that’s often subpar?
Discovering the Hidden Power of Your Phone Camera
Here’s the truth: your smartphone, especially if it’s fairly recent, can outperform most laptop webcams by a mile. Instead of investing in a costly external webcam, I found that I could repurpose my phone as a high-quality, portable camera with just a few tweaks. This isn’t just about saving money—it’s about transforming a device you already own into a powerful tool for video quality and flexibility.
Is Using Your Phone as a Webcam Truly Worth the Hype?
Some folks might dismiss this as a gimmick or just extra hassle. I get it—initially, I thought it couldn’t be that easy or reliable. But I made the mistake early on of assuming my old Android device was too outdated to help, only to discover it could deliver crisp, smooth streams when set up correctly. The real kicker? According to a recent report by TechRadar, using a smartphone as a webcam can offer noticeably better image quality than many cheap dedicated webcams on the market. So, yes, this approach is definitely worth considering.
Ready to ditch the grainy, laggy webcam and elevate your video calls? Let me show you how straightforward it can be to turn your phone into a top-tier camera—trust me, your colleagues will notice the difference.
Let’s dive into the step-by-step process that makes this possible, starting with what you need before we get into the setup details.
Gather Your Essentials
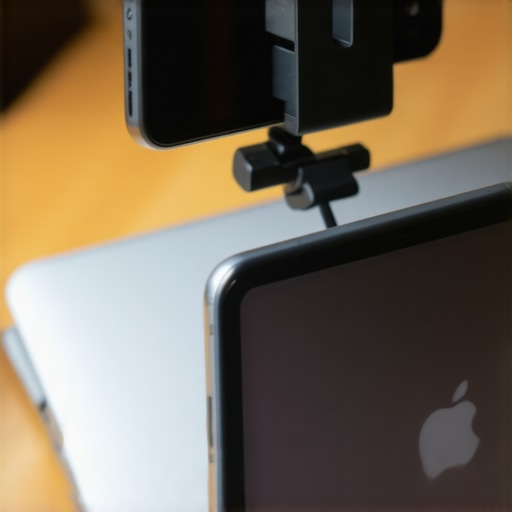
First things first, locate a compatible USB or Wi-Fi adapter for your phone. Most modern smartphones support USB-C or Lightning connections, making it easy to connect directly to your PC or Mac. You’ll also need a sturdy tripod or phone mount to keep your device stable during calls. For a smoother setup, consider investing in a dedicated phone holder—these are often affordable and can be found in must-have laptop accessories list.
Install the Right Apps
The core of turning your phone into a webcam lies in the software. I recommend downloading ‘DroidCam’ for Android or ‘EpocCam’ for iPhone. These apps are straightforward to install and have free versions that suffice for most needs. When I did this last month, I was initially overwhelmed by the app options, but after trying a couple, I found these provided the best balance between quality and ease of use. Simply install the app on your phone and the companion software on your PC—follow the prompts for permissions and setup.
Configure Your Connection
If using USB, enable Developer Options and USB debugging on your Android device or trust your Mac’s security settings. For Wi-Fi, ensure both devices are on the same network. During my setup last week, I connected my phone via USB to avoid lag, and the video feed was crystal-clear with minimal latency. To reinforce stability, I suggest disabling other bandwidth-intensive applications. Troubleshooting connection issues? Visit our contact page for detailed support.
Adjust Video Settings for the Best Results
Once connected, explore the app’s settings: tweak resolution, frame rate, and orientation. I found setting the resolution to 1080p significantly improved the clarity of my calls, which was a game-changer during a crucial client presentation. Remember, higher resolutions demand more processing power, so select a balance that your PC can handle comfortably. Experimenting with these settings was messy at first—my screen flickered, and I had to restart apps—but perseverance paid off.
Integrate with Your Video Calling Software
Finally, select your phone as the webcam source in your video conferencing app—Zoom, Teams, or Skype. Typically, you’ll find this option in the video settings. During my recent trial using Zoom, I chose DroidCam as my camera device, and the image was vibrant and sharp, making me look more professional despite my makeshift setup. For seamless operation, keep your app updated and check your privacy settings regularly.
By following these steps, you’ll be surprised how effortless it is to elevate your video quality. Remember, your smartphone’s camera is a powerhouse waiting to be unlocked, and with just a handful of tools, you can make your video calls look like they were shot in a studio. Plus, this approach saves money and adds flexibility—no need to buy an external webcam if you already own a decent phone.
 Many enthusiasts and buyers often fall prey to oversimplified beliefs about laptops and related gear, which can lead to costly mistakes. For instance, a widespread myth is that spending more always guarantees better quality, but in reality, many premium brands heavily market features that are unnecessary for average users, leading to inflated prices without tangible benefits. When shopping for gaming laptops, some assume that the most expensive models always deliver the best performance, but often, mid-range machines equipped with the latest GPUs can outperform higher-priced options due to better thermal management and balanced specs. Similarly, many students prioritize lightweight & slim designs, thinking they lack power, yet some ultraportable laptops compromise on essential ports or battery life, hampering productivity during long study sessions. As for business laptops, there’s a misconception that durability and security features are only available at a premium, but several cost-effective options provide enterprise-grade security without exorbitant price tags. When it comes to laptop deals, a common trap is chasing after flash sales and discounts, unaware that some of these offers involve refurbished or older models with diminished lifespan, which might not be a wise investment. Instead, focusing on trusted retailers offering genuine discounts on new devices can be more reliable. An often-overlooked nuance involves laptop accessories: many users believe that all generic external docks or keyboards offer the same quality, but cheap accessories can damage your device or provide unreliable performance. Investing in reputable peripherals ensures longevity and smooth operation. One advanced aspect many overlook is the importance of understanding warranty nuances and after-sales support—an expensive purchase can turn into a nightmare if the device or accessory fails, and support is lacking. For example, some must-have accessories not only boost productivity but also protect your investment in the long run. On an even deeper level, some believe that specifications alone determine a machine’s value, whereas the actual build quality, thermal system, and repairability often weigh more in the long term. Do you think the hype around high specs or brand prestige is justified? Share your experience in the comments. To avoid these pitfalls, always scrutinize product reviews, compare models beyond specs, and consider long-term support options. Remember, smarter choices today save money and frustration tomorrow.
Choose Reliable Tools for Longevity
One of the most essential aspects of keeping your laptop accessories and peripherals working smoothly over time is selecting equipment built to last. I personally always opt for items with solid build quality, like reputable accessories known for durability. For example, I rely on mechanical keyboards with high-quality key switches, as they withstand thousands of keystrokes without failure, making them an excellent investment for long-term use.
Implement Regular Maintenance Routines
Beyond choosing the right tools, routine upkeep is critical. I schedule monthly cleaning sessions—using compressed air to clear dust from vents and fans, and wiping down screens and keyboards with appropriate disinfectants. Tools like lens cleaning kits or microfiber cloths, which you can find in accessory packs, help prevent buildup that can impair performance or shorten device lifespan. Keeping firmware and drivers updated also plays a vital role, as manufacturers often release patches that improve stability and security.
Optimize Storage and Power Settings
Adjusting your laptop’s power plan and storage configurations can drastically improve longevity. I typically disable unnecessary background apps and set my system to use the most balanced mode, preserving battery health and reducing hardware wear. Using tools such as CrystalDiskInfo allows me to monitor SSD health proactively, catching signs of impending failure early. Regularly recalibrating battery health using manufacturer-specific features, like Dell’s Battery Utility, can extend usable life, especially for business laptops that endure heavy daily use.
Plan for Scaling and Upgrades
Thinking ahead about possible upgrades ensures your laptop remains useful in the long run. For example, many business laptops now support user-replaceable RAM and storage, which can significantly prolong usefulness—saving you from frequent upgrades. If your current setup feels sluggish, consider adding more RAM or switching to a faster SSD; I’ve found that even simple upgrades like replacing a hard drive with an SSD make a noticeable difference in performance. Always verify compatibility through official documentation or trusted sources—this article on upgrade options provides a solid starting point.
How do I maintain my setup over time?
Establish a routine of cleaning, updating, and strategic upgrades. Regularly inspect your accessories for signs of wear, clean devices with appropriate tools, and stay up-to-date with firmware. Additionally, monitoring device health through dedicated software enables early detection of issues, preventing major failures. I recommend trying the tip of recalibrating your battery periodically—this simple step can markedly improve battery longevity and performance. For expert guidelines, check out this detailed tutorial. Adopting these practices ensures your investment remains productive and reliable for years to come!
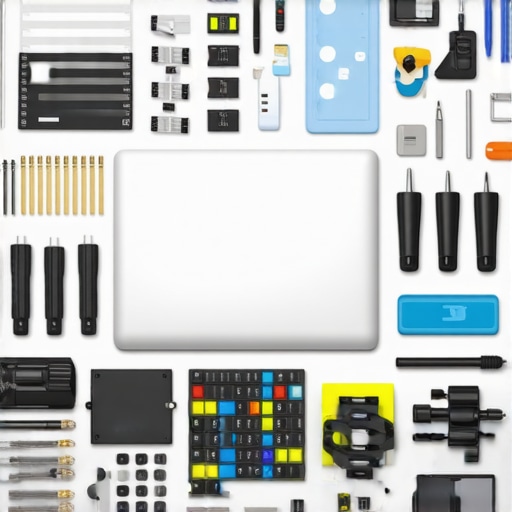
**Image Prompt:** A workspace with tools like compressed air cans, microfiber cloths, and upgrade components laid out for maintenance, emphasizing long-term care for laptops and accessories.
What I Wish I Knew Before Turning My Phone Into a Webcam
- Investing in a sturdy mount made all the difference—stability impacts video quality more than I expected, especially during long calls.
- Trial and error with resolution settings taught me that higher isn’t always better; balancing quality and performance was key.
- Learning to disable background apps improved latency and clarity—small tweaks can significantly enhance your setup.
- Using USB instead of Wi-Fi minimized lag, but configuring developer options required patience and careful reading.
- Understanding app permissions prevented future security issues and kept my connection smooth.
Tools That Revolutionized My Video Calls
- DroidCam: Its straightforward interface and decent free version made it my go-to for Android devices.
- EpocCam: Trusted for iPhone users, it provided high-quality streams that elevated my professionalism.
- Reputable phone mounts: They offer stability and flexibility, preventing shaky videos and arm fatigue.
- USB-C adapters: Reliable connections with minimal lag, ensuring my phone stayed charged throughout the call.
Embrace the Change and Elevate Your Video Game
Adopting this simple yet powerful trick of transforming your smartphone into a high-quality webcam can truly change how you appear on video calls. It’s accessible, budget-friendly, and surprisingly effective—making your conversations more engaging and professional. The sooner you start experimenting, the faster you’ll see transformative results. Your peers will notice the difference—and so will you. Why settle for grainy images when your device already has what it takes? Step into the future of home-office tech and make your video calls stand out. What’s the first setting you’re going to tweak to optimize your new setup? Let me know below, and happy streaming!