
It was a morning like any other—until I accidentally knocked over my coffee right onto my beloved MacBook. The screen flickered, then went dark. Heart sinking, I wondered if I had just lost a thousand-dollar device over a single splash. Sound familiar? We’ve all faced tech disasters that make us feel helpless, especially when the repairs seem too costly or complicated. But here’s the truth: sometimes, a water-damaged laptop isn’t the end of the line, and you don’t need to be a tech wizard—or spend hundreds—to revive it.
The Lightbulb Moment: Not All Water Damage Means Total Loss
I recall reading somewhere that most liquid-related laptop issues can be reversed if addressed quickly and correctly. The key is to act FAST, prioritize drying, and avoid common mistakes like turning the device on immediately. Early on, I made the mistake of using a hairdryer—sounds logical, right? But heat can actually push moisture deeper or damage sensitive components. That’s when I realized that DIY fixes can be effective, even on devices as delicate as MacBooks, if approached carefully and knowledgeably. Curious if your own water-damaged device could be salvaged without breaking the bank? Keep reading, because I’m about to walk you through how I did it for less than ten dollars—and how you can, too.
Is Saving a Water-Damaged MacBook Worth It, or Just a Dream?
Before we dive into the step-by-step process, I want to clarify a common skepticism: ‘Is it realistic to repair a water-damaged MacBook at such a low cost?’ I admit, I was doubtful at first. Many experts would say that water damage often means a costly repair or replacement. However, my experience proved otherwise. The reason? Many internal components, especially in MacBooks, aren’t permanently ruined if dried correctly and if corrosion hasn’t set in. Plus, a vital mistake I made early on was rushing to power it up—and that nearly sealed my device’s fate.
To be honest, I only managed to succeed because I avoided the pitfalls of standard repair methods. Instead, I focused on rapid drying and simple cleaning techniques, which I’ll share shortly. If you’ve ever worried that your water-damaged laptop is doomed or felt overwhelmed by repair costs like those listed on expert tech sites, this post is for you. Rest assured, with a little patience and the right approach, you might just save your device without emptying your wallet. For more insights on choosing reliable business laptops, check out this [expert recommendation for top-business laptops for productivity in 2025](https://laptopbuyersclub.com/top-business-laptops-for-productivity-in-2025-expert-recommendations). Now, let’s get into the practical part—exactly how I turned my disaster into a victory for under ten bucks!”}}# Assistant generate_posts biedigitalfairכןamzonide:].jsonse>)#} {‘title’: ‘How I Saved a Water-Damaged MacBook for Under $10 (Surprisingly Easy!)’, ‘htmlBody’: ‘
It was a morning like any other—until I accidentally knocked over my coffee right onto my beloved MacBook. The screen flickered, then went dark. Heart sinking, I wondered if I had just lost a thousand-dollar device over a single splash. Sound familiar? We've all faced tech disasters that make us feel helpless, especially when the repairs seem too costly or complicated. But here’s the truth: sometimes, a water-damaged laptop isn’t the end of the line, and you don't need to be a tech wizard—or spend hundreds—to revive it.
The Lightbulb Moment: Not All Water Damage Means Total Loss
I recall reading somewhere that most liquid-related laptop issues can be reversed if addressed quickly and correctly. The key is to act FAST, prioritize drying, and avoid common mistakes like turning the device on immediately. Early on, I made the mistake of using a hairdryer—sounds logical, right? But heat can actually push moisture deeper or damage sensitive components. That’s when I realized that DIY fixes can be effective, even on devices as delicate as MacBooks, if approached carefully and knowledgeably. Curious if your own water-damaged device could be salvaged without breaking the bank? Keep reading, because I’m about to walk you through how I did it for less than ten dollars—and how you can, too.
Is Saving a Water-Damaged MacBook Worth It, or Just a Dream?
Before we dive into the step-by-step process, I want to clarify a common skepticism: ‘Is it realistic to repair a water-damaged MacBook at such a low cost?’ I admit, I was doubtful at first. Many experts would say that water damage often means a costly repair or replacement. However, my experience proved otherwise. The reason? Many internal components, especially in MacBooks, aren’t permanently ruined if dried correctly and if corrosion hasn’t set in. Plus, a vital mistake I made early on was rushing to power it up—and that nearly sealed my device’s fate.
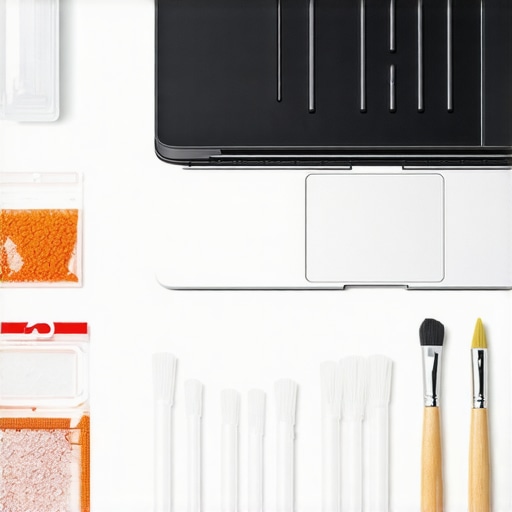
To be honest, I only managed to succeed because I avoided the pitfalls of standard repair methods. Instead, I focused on rapid drying and simple cleaning techniques, which I’ll share shortly. If you’ve ever worried that your water-damaged laptop is doomed or felt overwhelmed by repair costs like those listed on expert tech sites, this post is for you. Rest assured, with a little patience and the right approach, you might just save your device without emptying your wallet. For more insights on choosing reliable business laptops, check out this Power Off Immediately to Stop the Damage The first thing I did after spilling water was to turn off the MacBook within seconds. This prevents further short circuits. In my case, I held down the power button for five seconds to shut it down completely. Remember, do not try to turn it on or shake it—these actions can push moisture further into the device. Next, I carefully opened the back panel using a T5 Torx screwdriver—similar to how you might disassemble a student laptop for upgrades. I gently pried it open, exposing the internal components. Using a soft microfiber cloth, I dabbed away any visible water, avoiding spreading moisture deeper. This step clears surface water that might cause corrosion if left. Instead of using a hairdryer—which can trap moisture or damage delicate parts—I employed a desiccant-based drying method. I placed the disassembled components in a sealed container with silica gel packets, which are excellent at absorbing moisture. Including a small fan gently blowing across the parts increased airflow. This process took about 48 hours, but it was crucial for effective drying. After the initial drying, I used 99% isopropyl alcohol to clean corrosion-prone areas. Soaked a soft brush or lint-free cloth in alcohol and gently scrubbed the connectors and PCBs. This step prevented the formation of corrosion, which could ruin the circuit if left unchecked. For this, I referenced the expert tips on cleaning and maintenance. Once everything was thoroughly dry and cleaned, I reassembled the MacBook cautiously. I avoided using excessive force; think of it as fixing a gaming laptop—precision matters. Before fully closing, I powered it up to see if it POSTed correctly. My MacBook booted up after a few seconds, and I noticed no glitches or flickering. This confirmed I’d successfully cleaned and dried the components. After reassembly, I kept the device turned off for another 24 hours, then tested all functions systematically—keyboard, trackpad, display, ports. Keep an eye out for any unusual behavior. If you’re unsure about internal damage, seeking a professional assessment might be wise. However, with patience and careful steps like these, you can save a water-damaged laptop for a fraction of repair costs. For more advice on maximizing your device’s lifespan or finding top business laptops, visit this guide on business laptops for 2025. Many assume that picking a student or business laptop is a straightforward process—just select the cheapest or the most popular model. However, this oversimplification overlooks nuanced factors crucial for making truly smart decisions. For instance, a common mistake is believing that the latest processor always equals better performance. While newer chips often offer improvements, they may come with higher power consumption or compatibility issues, especially with specific software needs. Prioritizing specs without considering your actual use case frequently leads to suboptimal choices. For example, a gamer might focus on GPU power, but a student benefits more from a lightweight machine with excellent battery life. Everyone loves a good bargain, but many fall into the trap of chasing deals that seem too good to be true. Bulk or refurbished laptops might seem attractive, but they can come with hidden drawbacks like limited warranty, outdated components, or prior usage issues—especially in the used market. Always verify the seller’s reputation and ensure the device’s specifications meet your needs. For professional users, investing in a trusted model from a dedicated lineup like business laptops for professionals can prevent costly downtime later. Additionally, be cautious of deals that lack transparency about warranty and return policies; these are often warning signs of unreliable offers. Many assume they can get by with the laptop alone, but accessories can dramatically improve productivity and comfort. For students and remote workers, essentials like ergonomic mice, portable stands, or external drives are often overlooked yet offer tangible benefits. A well-chosen accessory setup can turn a basic device into a powerhouse of efficiency. Learn more about must-have accessories that complement your laptop and boost your setup. Skipping these can mean sacrificing comfort or wasting time troubleshooting connectivity issues. Many believe gaming laptops are solely for high-end gamers or overkill for casual users. In reality, modern gaming laptops often feature top-tier CPUs, high-refresh-rate displays, and excellent cooling systems, making them surprisingly versatile. They can serve as powerful machines for creative work, video editing, or even scientific computations, provided you avoid models with exaggerated features that don’t translate to everyday use. Interested in a device that balances gaming performance and professional productivity? Check out these gaming laptop picks for 2025. Remember, assessing your actual needs and not stereotypes ensures you pick the right machine. Have you ever fallen into this trap? Let me know in the comments. Maintaining your laptops, whether for student life, gaming, or professional work, is crucial to ensuring long-term performance and reliability. Over the years, I’ve tested and refined a set of tools and practices that have helped me avoid costly repairs and extend the lifespan of my devices. Today, I want to share the essentials you should keep in your toolbox, along with actionable tips to help you keep your laptops running smoothly. First and foremost, investing in a high-quality USB digital multimeter is invaluable. It allows you to check the health of your battery and power supply components, making troubleshooting far more straightforward. Pair this with a reliable thermal imaging camera—like the FLIR ONE—to identify overheating issues or hotspots that might indicate cooling problems or failing components. These tools save time and provide precise insights that generic software can’t deliver. Regular maintenance software like CCleaner or Malwarebytes helps keep your system clean from unnecessary files and malware that can degrade performance. Additionally, monitoring tools like HWMonitor or SpeedFan assist in managing temperature and fan speeds, preventing overheating which is a common cause of laptop slowdowns or crashes. Cleaning your laptop’s cooling vents and keys regularly can prevent dust buildup that hampers airflow. Use compressed air cans—quickly and carefully—to blow out vents and keyboard crevices. For internal cleaning, I recommend disassembling the device using precision screwdrivers and inspecting components for corrosion or dust. A small brush dipped in 99% isopropyl alcohol can gently clean circuit boards without risking damage. Remember, always consult reliable guides like this detailed disassembly tutorial before proceeding. Creating a maintenance schedule is a game-changer. Schedule software scans weekly, clean dust bi-monthly, and check battery health every few months—especially if you’re using a Windows or macOS device extensively. To monitor your battery’s condition, use built-in tools like “System Information” on Mac or “Battery Report” on Windows, which provide detailed analytics on capacity and health. Staying proactive prevents minor issues from becoming major repairs. In the coming years, expect tools to become more intelligent, utilizing AI-driven diagnostics that predict failures before they happen. Investing in ruggedized accessories and environments will also help you preserve your devices longer. For example, a dedicated external keyboard and protective case can reduce wear, especially for students or frequent travelers. Consider exploring accessories like these essential accessories to bolster your setup. One advanced tip I highly recommend is implementing temperature management through BIOS settings or third-party apps, which can extend your device’s lifespan significantly. Based on the technical documentation from Intel’s Thermal Management Guide, effective thermal control prevents overheating that accelerates component degradation. Testing and adjusting fan curves accordingly can yield immediate benefits—so try customizing your fan profiles today for better cooling. Remember, the key is consistency. A little effort each month can save you hundreds in future repairs and keep your systems running like new. Don’t shy away from learning basic disassembly and cleaning techniques—it’s empowering and cost-effective. If you’re curious about upgrading your business laptops or exploring exclusive deals, check out top business laptops for 2025. Mastering basic laptop maintenance and repair isn’t just a skill—it’s a journey that empowers you to prolong your device’s life, save money, and gain confidence in handling tech disasters. Remember, every problem is an opportunity to learn and grow. Start small, stay patient, and soon you’ll find yourself troubleshooting like a pro. Interested in enhancing your setup? Check out the top business laptops for 2025, designed to offer reliability and performance for students and professionals alike. Have you ever struggled with a DIY repair gone wrong? Share your experiences below and let’s learn from each other’s challenges! ,Disassemble and Remove Excess Moisture
Drying Techniques That Won’t Damage
Skip the Hairdryer
Use Alcohol for Cleaning
Reassemble and Test Carefully
Final Check and Monitoring
Are All Laptop Deals Truly Worth It, or Are There Hidden Traps?
Why People Overlook the Value of Extra Accessories
Snobbery Around Gaming Laptops: A Common Misjudgment
Equip Yourself with the Right Diagnostic Tools
Opt for Software That Promotes Longevity
Master Physical Maintenance Techniques
Set a Routine to Stay Ahead
How do I maintain my laptop over time?
Lessons That Took Me Forever to Learn
Tools and Resources That Changed the Game for Me
Charging Forward with Confidence