
I still remember the absolute panic. I was sitting in a sunny, crowded cafe, trying to show a client my latest design draft on my beautiful gloss-finish display. But as the afternoon light flooded through the window, my screen didn’t show my work. Instead, it revealed a horrifying constellation of oily fingerprints, mysterious keyboard imprints, and a greasy smear from where I had closed the lid on a stray crumb. I tried wiping it quickly with the sleeve of my favorite wool sweater. Big mistake. The smudge didn’t disappear; it just spread into a giant, cloudy fog that made my high-end machine look like it had been salvaged from a dusty attic. It was deeply embarrassing, and worse, I couldn’t see my own work clearly.
The War Against the Infinite Screen Smear
We touch our screens. We sneeze near them. We close them while our hands still carry the oils of lunch. If you own one of the top business laptops for productivity, you know that keeping that display pristine is a constant battle. Yet, most of us treat our expensive panels with reckless disregard, grab whatever spray is closest, and hope for the best. Today, I want to share the exact, residue-free method I perfected over years of trial, error, and unfortunately, ruined anti-reflective coatings. We are going to banish those stubborn streaks forever without spending a fortune on fancy, gimmicky cleaning kits.
Is tap water actually safe for my expensive display?
This is the big question that almost everyone gets wrong. Early in my tech journey, I used to think a damp paper towel with a splash of tap water was totally fine. It wasn’t. Tap water contains dissolved minerals like calcium and magnesium. When the water evaporates off your glass or plastic display, those tiny minerals stay behind, acting like micro-abrasives that can permanently micro-scratch your screen over time. According to research by materials scientists, even minor mineral deposits can strip away delicate anti-reflective coatings. This is especially true if you opted for specialty displays; for instance, many users who prefer glossy screens over matte learn the hard way that gloss shows micro-scratches instantly under direct light. To keep your hardware safe, we must ditch the tap water entirely and stick strictly to distilled water mixed with isopropyl alcohol, or better yet, dry microfiber first.
Why your kitchen towel is secretly ruining your view
Before we touch any liquid, we have to talk about the cloth. Most people grab a kitchen towel, a tissue, or even a t-shirt. These wood-pulp products and coarse fabrics are abrasive on a microscopic level. They don’t trap dust; they drag it across the surface, creating tiny hairline scratches. If you want to protect your investment—whether it is a budget machine or one of the premium gaming laptops you saved up for—you need a high-quality, high-density microfiber cloth. Have you ever ended up making your screen look worse after trying to clean it? Let me know in the comments below, because I certainly have. Let’s move on to the actual step-by-step process to get that crystal-clear finish.
I will never forget the time I ruined my first premium workstation. I had just purchased one of the most expensive business laptops for professionals and was desperate to remove a coffee splatter. I sprayed a generic glass cleaner directly onto the screen. Within seconds, the liquid seeped under the bottom bezel, shorted out the backlight inverter, and created a permanent, glowing purple bar across the left edge. It was an expensive mistake that taught me a brutal lesson: cleaning a modern display is not about scrubbing; it is about delicate chemistry and controlled physical pressure.
The zero-damage formula for a flawless display
Before you touch your screen, you must shut down your laptop and unplug it from the wall. This is not just a safety precaution to prevent electric shocks. A dark, inactive display allows you to actually see the dust particles and greasy fingerprints clearly. More importantly, when the pixels are off, the screen remains cool. Cleaning a warm, active display causes your solution to evaporate too quickly, leaving behind those stubborn, hazy residues that are incredibly difficult to polish out.
Step 1: The dry sweep to prevent microscopic scratches
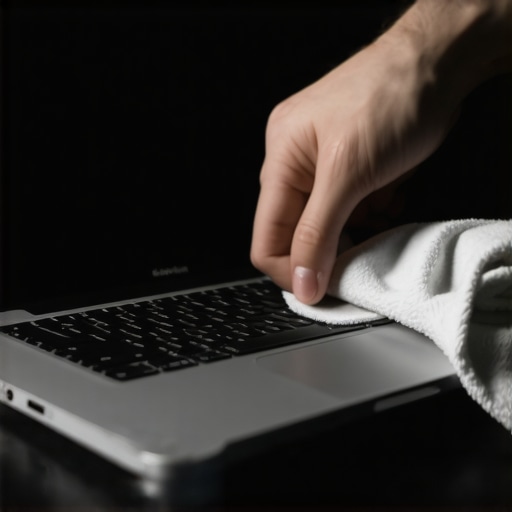
The biggest mistake most people make is applying liquid immediately. Think of your laptop screen like the hood of a luxury car. If you wipe down a dusty car with a wet cloth, you are simply grinding the dirt into the paint. The same rule applies here. Take a fresh, dry microfiber cloth and gently sweep it across the screen in one direction—from top to bottom. Do not press down. Let the natural static charge of the high-density microfiber grab the loose dust particles, pet hair, and crumbs. If you own one of those gorgeous, highly reflective panels, you will want to read about why professional editors prefer glossy screens over matte, because keeping these displays completely scratch-free requires this crucial dry step first.
Step 2: The damp cloth misting technique
Never spray anything directly onto your computer. Instead, lightly mist your microfiber cloth. Your cloth should feel barely damp, like a leaf on a foggy morning, not wet. If you can wring water out of the cloth, it is far too wet. Use a 50/50 mixture of distilled water and isopropyl alcohol (70% concentration or lower). Gently wipe the screen using broad, overlapping circular motions. This technique mimics the way professional detailers polish glass, distributing the physical pressure evenly so you do not put too much stress on a single point. If you are cleaning sensitive hardware, like some of the sleek student laptops that boost productivity, you must avoid aggressive rubbing near the edges where the bezel meets the panel.
Step 3: Buffing to a streak-free finish
Immediately after applying the damp cloth, flip your microfiber cloth over to the completely dry side. Using the same gentle, circular motions, buff the screen to dry any microscopic droplets of moisture before they can evaporate on their own. This rapid buffing action is the real secret to achieving that invisible finish. It prevents the minerals or cleaning agents from settling, leaving you with a display that looks exactly as it did the day you unboxed it.
How to handle stubborn sticky spots without pressure
Occasionally, you will run into a mystery substance—perhaps a dried drop of soda or adhesive residue—that refuses to budge. Your instinct will be to press harder with your fingernail. Do not do it. Excessive localized pressure can easily damage the delicate liquid crystals behind the outer protective layer. If you apply too much force, you might end up needing to troubleshoot the only way to fix a dead pixel on your laptop screen because you ruptured the subpixel structure. Instead, hold the damp portion of your microfiber cloth over the stubborn spot for sixty seconds. Let the moisture naturally break down the bond of the dried residue, then gently wipe it away without any downward pressure.
When we talk about maintaining a pristine screen, we are usually trying to protect a massive financial investment. This brings us to a major point of confusion where even experienced tech enthusiasts stumble. There is a deeply ingrained myth in the tech community that purchasing high-end hardware automatically guarantees durability. We assume that because we bought the most expensive, top-tier device, its screen must have some military-grade coating capable of resisting any chemical. In reality, the opposite is often true.
The premium display paradox you cannot ignore
Everyone tells you to buy the highest spec possible to ensure longevity, but in my experience, the ultra-premium displays are actually the most fragile. Manufacturers of high-end panels apply highly specialized chemical layers to reduce glare, enhance contrast, and repel oil. These coatings are incredibly thin—often measured in nanometers. When you use aggressive commercial glass cleaners, you are not just cleaning; you are slowly dissolving these expensive layers. I have seen stunning, color-accurate panels completely ruined because the owner assumed their premium device could handle standard household window spray. Have you ever fallen into this trap? Let me know in the comments below, because sharing these mistakes helps all of us protect our gear.
Why do matte screen protectors actually degrade your high-end display?
Many users buy a premium device with a gorgeous gloss screen and immediately install a matte protector to block reflections. However, materials science papers on optical clarity confirm that adding an aftermarket matte layer introduces microscopic air gaps and uneven surfaces that scatter light. This scattering completely destroys the color accuracy and contrast ratio you paid a premium for. This is why we stopped buying matte screen protectors for OLED laptops entirely. If glare is your primary enemy, it is far better to change your physical workspace or choose a native matte panel from the start rather than trying to patch a glossy one with cheap plastics.
The dangerous trap of aftermarket keyboard covers
Another common mistake that ruins pristine screens is the use of thin silicone keyboard covers. People use them to keep dust out of their keys, but modern ultra-thin laptops are engineered with incredibly tight tolerances. When you close the lid, there is virtually zero space between the glass and the keys. The silicone cover presses directly against the screen, transferring oils from your fingers directly onto the anti-reflective coating. Over time, the heat from the laptop fuses these oils to the screen, leaving permanent keyboard-shaped stains that no microfiber cloth can ever remove.
If you want to keep your setup safe without compromising performance, it is vital to focus on high-quality utility rather than cheap protective gimmicks. Whether you are hunting for top laptop deals in 2025 or upgrading your current machine, investing in proper, tested tools is the only way to ensure your hardware survives years of daily use. Pair your clean screen with must-have laptop accessories to boost your work setup, and you will have a workspace that looks and performs like new for years to come.
Understanding the chemistry of your display coatings is only half the battle. The real trick to keeping your workspace flawless lies in the tools you choose to keep in your daily toolkit. I have tested dozens of expensive retail cleaning kits, and honestly, almost all of them are overpriced marketing gimmicks. Instead, I rely on a highly specific set of tools that cost less than a cup of coffee but deliver professional-grade results every single time.
How do I maintain my laptop screen over time?
Consistent, low-friction maintenance is the key to longevity. First, I keep a pack of premium, borderless 400 GSM microfiber cloths specifically reserved for my screens. Standard microfiber cloths have stitched, polyester edges that can easily scratch a delicate anti-reflective coating. By choosing borderless, sonic-cut cloths, you eliminate that risk entirely. Second, I only use 99% pure isopropyl alcohol diluted with pure distilled water in a dedicated fine-mist amber glass spray bottle. This allows me to control the exact dilution ratio and ensures no light or chemical breakdown occurs while the solution sits in my drawer. If you are constantly on the move, maintaining your gear is just as important as organizing your bag; in fact, mastering the secret to organizing your laptop bag for heavy travel will keep your cleaning tools from crushing or contaminating your screen while in transit.
The future of display coatings and self-healing screens
As we look toward the future of mobile computing, the way we protect our screens is set to change dramatically. Materials scientists at leading display laboratories are currently developing self-healing oleophobic polymers. In the next few years, I predict we will see laptop displays capable of automatically repairing minor micro-scratches and dissolving finger oils using ambient UV light. Until those futuristic panels arrive on the market, we must remain disciplined with our current hardware. If you are shopping around for new gear or looking to secure top laptop deals in 2025, don’t let the fear of maintenance hold you back. Just make sure you pair your new machine with must-have laptop accessories to boost your work setup so you have the right microfiber tools ready from day one. I highly recommend trying the dry-sweep method tonight on your current machine—you will be amazed at how much dust you can clear safely without using a single drop of liquid.
The Hardest Screen Maintenance Lesson I Learned the Hard Way
After years of managing multiple workstations and trying every retail cleaning solution under the sun, I arrived at a few sobering realizations. First, convenience is almost always a trap. Those pre-packaged wet wipes sitting in your desk drawer are saturated with harsh chemicals like ammonia or low-grade alcohol that slowly eat away at delicate anti-reflective coatings. Second, physical pressure is your absolute enemy. If a smudge doesn’t come off with a light, circular glide of a microfiber cloth, applying more muscle will only end in tears. I once ruined a gorgeous, color-accurate panel by trying to scrub away a tiny speck of dried adhesive. I ended up having to learn the only way to fix a dead pixel on your laptop screen because my localized brute force ruptured the delicate subpixel layer beneath the glass. True screen care is about patient chemical dissolution, never friction.
My Essential Workspace Care Toolkit
You don’t need to spend forty dollars on a branded cleaning kit. In fact, my highly trusted setup costs less than a fancy cup of coffee and performs significantly better. Here is exactly what I keep in my maintenance drawer:
- Borderless 400 GSM Microfiber Cloths: Standard microfibers have stitched polyester edges that can easily catch and scratch a sensitive panel. Borderless, sonic-cut cloths remove this risk entirely.
- Pure Distilled Water: This is non-negotiable. Tap water contains minerals that act like tiny sandpaper crystals under your cloth. Distilled water ensures zero mineral residue.
- 70% Isopropyl Alcohol: When mixed 50/50 with distilled water, this provides the perfect balance of grease-cutting power without being harsh enough to dissolve the protective oleophobic layers.
- Amber Glass Fine-Mist Spray Bottle: Plastics can leach chemicals into your cleaning mixture over time. Glass keeps your solution chemically pure and delivers a true, ultra-fine mist rather than large, heavy droplets.
By pairing these simple tools with some of the must-have laptop accessories to boost your work setup, you can ensure your daily environment remains clean, professional, and completely functional.
Take Control of Your Screen Clarity Today
A dirty screen isn’t just an aesthetic eyesore; it directly impacts your productivity, causes unnecessary eye strain, and can permanently devalue your premium tech investment. Whether you are using your machine for intense design sessions or just picked up one of the top laptop deals in 2025, keeping your display flawless is a direct reflection of how you care for your tools. Take five minutes tonight to try the dry-sweep method followed by a very light, damp mist on your current machine. You will be absolutely amazed at how much hidden dust and film you can safely remove. What is the absolute worst thing you have ever accidentally sprayed on your laptop screen? Let me know in the comments below, and let’s save some displays together!