
I still remember the sinking feeling in my stomach when I took a butter knife to the lid of my first high-end rig. I had just scored one of those unbeatable laptop deals and, in my youthful excitement, plastered the lid with every tech brand sticker I could find. Fast forward two years: I was trying to sell it to fund a newer machine, and the adhesive had turned into a concrete-like substance. One slip of the blade, and I had carved a permanent, jagged souvenir into the aluminum. It was a heart-breaking lesson in patience. Removing stickers isn’t just about aesthetics; it is about preserving the life and value of your gear. If you have ever spent an hour picking at a corner only to make the mess worse, this guide is for you.
Save Your Resale Value Before It Is Too Late
We often treat our machines as permanent fixtures, but the reality is that most of us will eventually move on to newer hardware. I learned the hard way that keeping your laptop resale value high depends heavily on the physical condition of the chassis. A lid covered in “ghosting” patterns or sticky residue screams neglect to a potential buyer. Whether you are using one of the latest business laptops for work or a rugged machine for class, that first impression matters. The goal isn’t just to get the paper off; it is to remove the chemical bond without scratching the delicate finish underneath. According to adhesive experts at 3M, the bond strength of pressure-sensitive adhesives can actually increase over time due to a process called ‘wet-out,’ which is why that sticker you put on three years ago feels like it is part of the atom structure of the laptop now.
Is This Really Necessary for a Tool I Use Every Day?
Some might argue that a few scratches on an old student laptop don’t matter, but improper removal techniques often involve chemicals that can warp plastic or strip the finish entirely. I once tried using a heavy-duty industrial degreaser on a budget Chromebook and watched the plastic literally start to soften and lose its texture. It was a disaster. Have you ever tried a ‘quick fix’ that ended up costing you more in the long run? By using the right household items and a bit of heat, you can avoid my past failures and keep your machine looking brand new. Let’s look at the actual steps to get that clean, professional look back without the frustration.
Shut Down and Clear Your Workspace First
Before you even touch that adhesive, you need to ensure your machine is safe. I once tried to ‘quickly’ peel a badge off a running machine while it was plugged into a 100W PD charger, and the heat from the internals combined with the friction of my rubbing caused the adhesive to liquefy and seep into the bezel. Turn the laptop off, unplug every cable, and remove any laptop accessories that might get in the way. You want a flat, stable surface where you can apply even pressure without the laptop sliding around. Think of it like prepping a canvas; you cannot do a professional job on a cluttered, vibrating desk.
A Hairdryer Is Your Secret Weapon
The biggest mistake people make is trying to peel cold. Most adhesives used on gaming laptops are designed to stay put under standard operating temperatures. To break that bond, you need controlled heat. Use a hairdryer on its lowest setting and sweep it back and forth over the sticker for about 30 to 45 seconds. You are not trying to bake the components; you are just warming the glue to the consistency of soft butter. I remember doing this on a premium workstation and being terrified I’d melt the screen, but as long as you keep the dryer moving and don’t hold it in one spot, the glue will give up its grip long before the plastic reaches its melting point. If the lid feels too hot to touch comfortably, you have gone too far. 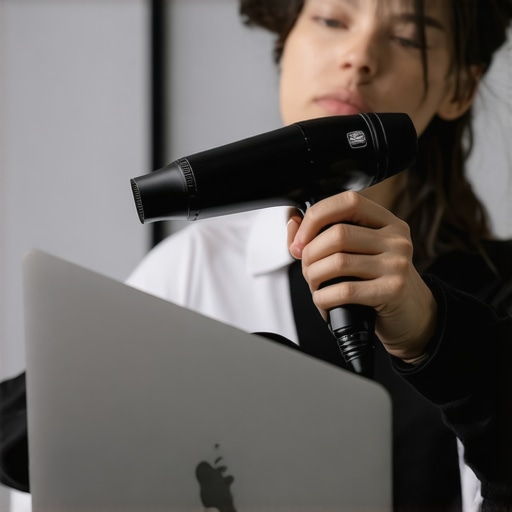
Scrapers Are for Windshields Not Aluminum Lids
Once the sticker is warm, use your fingernail or a plastic credit card to lift a corner. Never, ever use a metal blade. I once watched a friend use a pocket knife on one of those top laptop deals he had just scored, and the resulting scratch looked like a lightning bolt across his lid. If the corner doesn’t lift easily, apply another 15 seconds of heat. Peel slowly at a 45-degree angle. If you pull straight up, you risk delaminating the sticker and leaving the entire adhesive layer behind. It is a game of patience, much like trying to fix a wobbly laptop hinge—one wrong move and you’ve created a permanent problem.
The Right Way to Kill the Sticky Residue
Even with perfect heat, you will likely have a ‘ghost’ of the sticker left behind. This is where people panic and grab the heavy chemicals. Instead, reach for 90% Isopropyl alcohol and a microfiber cloth. This is the same stuff you should use for cleaning a greasy trackpad without causing damage. Put a small amount on the cloth—not the laptop—and rub in circular motions. Avoid using paper towels, as they are surprisingly abrasive and can leave micro-scratches on glossy finishes. If the residue is particularly stubborn, a tiny bit of vegetable oil on a cloth can break down the stickiness, but you must follow up with alcohol to remove the oil afterwards. I once used a ‘goo-remover’ that smelled like oranges and it permanently stained the silver finish of a business laptop, so always test a tiny, hidden area first if you are using anything other than alcohol.The biggest mistake I see veterans and newbies alike making is assuming that once the residue is gone, the job is done. There is a hidden nuance to laptop aesthetics that most people overlook: UV-induced ghosting. If you have ever scored one of those unbeatable laptop deals and peeled off a long-standing asset tag, you might see a perfectly shaped silhouette of the old sticker despite the surface being smooth. This isn’t glue; it is the fact that the rest of the chassis has slightly changed color due to light exposure while the area under the sticker remained preserved. Everyone says you should scrub harder, but in my experience, more friction only makes it worse by polishing the matte finish into a permanent shiny spot. According to a study in the Journal of Applied Polymer Science, synthetic polymers and anodized coatings undergo subtle chemical shifts when exposed to ambient UV light, meaning that ‘ghost’ is now part of the material itself.
The Ghost in the Machine You Can’t Scrub Away
If you are dealing with a high-end machine from one of the only 3 brands that still make easily repairable laptops, you have to be even more careful. Magnesium alloys and premium plastics react differently to cleaners. I once saw a student try to fix ghosting on a student laptop by using a magic eraser. Do not do this. A magic eraser is essentially ultra-fine sandpaper; it will strip the topcoat and leave a massive, dull patch that looks far worse than a sticker silhouette. The trap here is the desire for perfection leading to over-restoration. Sometimes, the best move is to simply let the area age naturally for a few months until the light exposure evens out.
Can You Actually Reverse UV Discoloration on an Older Lid?
The short answer is usually no, but you can blend it. Advanced restorers sometimes use a very light application of high-quality automotive trim restorer on plastic chassis, but this is risky territory. If you are prepping business laptops for a fleet rollout, the only professional solution is often a high-quality vinyl skin. This not only hides the ghosting but prevents future damage. Have you ever fallen into this trap of trying to scrub away a phantom sticker? Let me know in the comments.
Why Most People Ruin Their Screens While Cleaning the Lid
Here is the ‘oops’ factor that kills more machines than I’d like to admit: liquid seepage. When you are focused on the lid, it is easy to use too much alcohol or cleaning agent. If that liquid runs down the side of the lid, it can capillary-action its way into the bezel. I have seen countless gaming laptops with permanent ‘bruises’ or dark spots at the bottom of the display because the user was too aggressive with a spray bottle. Always apply your cleaner to the cloth, never the chassis. Even if you are just adding laptop accessories like a new webcam cover, a single drop of liquid in the wrong place can be a hundred-dollar mistake. Always tilt the laptop so the screen is facing down if you must work with liquids near the edges. It’s these small, professional habits that separate a clean machine from a broken one.I’ve spent years tinkering with these machines, and the difference between a five-year-old laptop that feels like new and a one-year-old laptop that feels like a brick is almost always the user’s willingness to perform basic maintenance. It’s not just about the exterior aesthetics we discussed earlier; it’s about the health of the silicon under the hood.
Avoid the Nightmare of a Stripped Security Screw
If you want to do more than just wipe the surface, you need the right gear. I used to think a generic hardware store set was enough until I stripped a tiny Torx T5 screw on a premium ultrabook, turning a ten-minute fan cleaning into a three-hour extraction disaster. Now, I only use the specific screwdriver kit you need to open 90% of modern laptops. These kits feature magnetized tips and hardened steel that won’t round off the shallow heads found in most modern devices. When you have a kit designed specifically for electronics, you aren’t fighting the hardware; you’re treating it with the precision it deserves. #IMAGE_PLACE_HOLDER_D#
Breathe New Life into Your Cooling System
Most people complain that their machine feels sluggish after eighteen months and immediately look for a new one. Usually, it isn’t the processor aging—it’s the dust. You need to learn how to clean the dust out of your laptop without opening it if you are still under warranty, but for those of us with older rigs, a manual blast of air directly into the heat sink is transformative. A report by the Basel Action Network on global e-waste highlights that preventable thermal failure is a leading cause of premature hardware retirement. Don’t let a $5 can of air be the reason you spend $1,500 on a replacement. When dust builds up, your fans spin faster, consume more battery, and eventually, the system throttles your CPU speed to prevent melting.
How do I prevent my performance from dropping every year?
The secret is a combination of managing heat and optimizing your power cycles. I personally set my battery charge limit to 80% if I’m docked most of the day, which significantly slows down chemical degradation. If you’ve noticed your runtime shrinking already, check out this guide on how to fix your laptop battery if it only lasts one hour. Also, keep an eye on why gaming laptops still struggle with thermal throttling in small frames; even high-end units need proper airflow to maintain peak clock speeds. I suggest adding must-have laptop accessories for a seamless setup that prioritize elevation and cooling, like a simple mesh stand that lets the intakes breathe.
The Modularity Revolution Is Finally Coming
Looking ahead, I predict we are moving toward a ‘right to repair’ golden age. We are already seeing a shift from the only 3 brands that still make easily repairable laptops toward more mainstream manufacturers adopting modular components. In three years, peeling a sticker might be the hardest part of maintenance because the internals will swap out like LEGO bricks. This trend is driven by both consumer demand and new EU regulations on battery accessibility. For now, the best thing you can do is stay proactive. Try opening your laptop just once to clear out the dust—you’ll be shocked at the performance boost and the satisfaction of knowing your machine is running exactly as it was designed.
The Hidden Reason Your High-End Laptop Looks Old
After years of flipping machines, I’ve realized that the ‘new laptop feeling’ isn’t about the CPU speed; it’s about the tactile cleanliness of the device. Even the best unbeatable laptop deals lose their charm when the chassis is gummed up. One major lesson I learned is to never put a sticker on the palm rest. The oils from your skin react with the adhesive and the heat from the battery underneath, creating a permanent discoloration that even the best cleaners can’t fix. Also, remember that patience is your best friend; if you wait three years to remove a sticker, you are essentially baking it into the finish. Finally, always keep a small bottle of 90% isopropyl alcohol handy; it is the single most versatile tool for keeping business laptops looking like they just came out of the box.
My Personal Maintenance Kit for Any Machine
You don’t need a professional workshop to keep your gear in top shape. I rely on three things that have saved me hundreds in potential damage costs. First, the specific screwdriver kit you need to open 90% of modern laptops is non-negotiable if you want to clear out dust properly. Second, invest in a set of high-quality microfiber cloths—the kind used for camera lenses—because cheap rags will scratch your screen. Third, I always keep a few must-have laptop accessories for a seamless setup like a silicone keyboard cover, which prevents the oils from your fingers from permanently ‘shining’ the keys. These tools ensure your student laptops can survive the library, the coffee shop, and the backpack without looking like they’ve been through a war zone.
#IMAGE_PLACEHOLDER_E#
Take Control of Your Tech Longevity
It is easy to get caught up in the cycle of hunting for top laptop deals in 2025, but there is a deep satisfaction in owning a machine that still performs like new after years of heavy use. Taking twenty minutes once a month to wipe down the chassis and clear the vents isn’t just about vanity; it is about respecting the tools that help you build your career or finish your degree. When you treat your laptop like a long-term investment rather than a disposable toy, you save money and reduce the e-waste that is currently overwhelming our planet. Don’t be afraid to get your hands a little dirty—maintenance is a skill that pays for itself ten times over.
Have you ever had a sticker leave a permanent ‘ghost’ on your favorite machine? Let me know your worst residue horror stories in the comments below!