
I was hunched over my desk, sweat beads forming on my forehead, not because the game was intense, but because my lap felt like it was sitting on a live stovetop. My frame rates had plummeted, and my expensive machine was wheezing. I’d spent weeks researching the game-changing gaming laptops for 2025 adventures, yet here I was, dealing with a device that couldn’t handle its own power. It was infuriating. I tried the usual tricks, like checking your laptop fan for dust without opening it, but the air coming out was already scorching. The heat wasn’t staying inside; it just wasn’t getting to the fans fast enough.
Stop Letting Your CPU Choke on Its Own Heat
We’ve all been there—the stuttering, the sudden lag, and that annoying fan whine that sounds like a miniature jet engine. This is thermal throttling, and it’s the way your laptop protects itself from literally melting. I used to think I could just buy my way out of this problem. I bought expensive mats and stands, only to realize that most laptop cooling pads are just loud paperweights that don’t address the core issue: the gap between your chip and the cooling pipe.
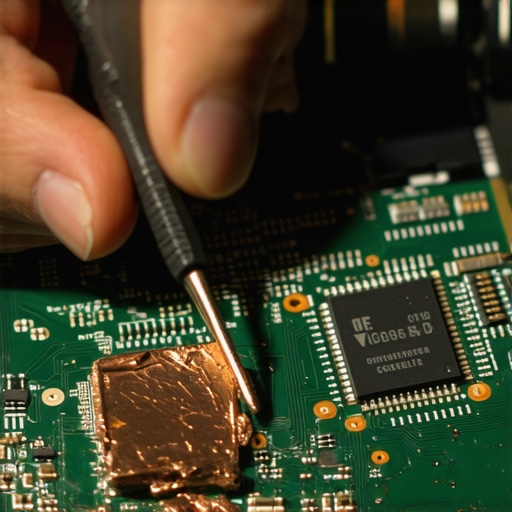
My biggest mistake? I once tried to solve this by globbing on a massive mountain of cheap thermal paste. I thought “more is better,” but all I did was create an insulating layer of goop that made things worse. I eventually learned how to replace your laptop thermal paste without breaking anything, but even the best paste can’t bridge a physical air gap caused by a poorly fitted heatsink. That’s where the $5 shim comes in. It’s a simple, elegant piece of copper that fills the void and lets the heat flow. Today, I’m going to show you how this tiny investment can give you back the performance you actually paid for.
Is sticking a random piece of metal in my laptop actually safe?
It’s natural to be skeptical. Opening up a machine and messing with the motherboard feels like heart surgery. However, when you realize that even a 0.5mm gap in thermal interface material can lead to temperature spikes of over 20°C—a fact supported by thermal testing data from Gamers Nexus—you start to see that the “safe” factory setup is actually what’s killing your hardware. By carefully placing a copper shim, we aren’t “hacking” the system; we’re finishing the job the manufacturer rushed through to save a few cents.
Have you ever felt like your laptop was intentionally slowing down just when you needed it most? Reach out and tell me your story. Before we dive into the teardown, you might want to undervolt your gaming laptop first to see if a software fix helps, but if you’re ready for the real deal, let’s look at the hardware.
Measure Twice and Buy the Right Copper Thickness
You cannot simply throw any piece of metal into your machine and expect it to work. If the shim is too thin, it won’t make contact with the heatsink; if it’s too thick, you risk cracking the fragile silicon die when you tighten the mounting screws. I learned this lesson the hard way while refurbishing a unit I snagged using the secret to buying laptops directly from lease returns. To find your exact gap size, you need a set of feeler gauges or a bit of ‘thermal putty.’ Place a small ball of putty on the chip, screw the heatsink down completely, then remove it and measure how thin the putty was compressed with a digital caliper. Most modern game-changing gaming laptops for serious players in 2025 typically require a shim between 0.3mm and 0.8mm for optimal results.
The Paper Test to Check Your Heatsink Tension
Before you ever apply a single drop of expensive paste, you must perform a ‘dry fit’ to ensure your measurements were correct. Place the copper shim directly on the dry CPU die and lower the heatsink onto it. Do not screw it in yet. Instead, try to slide a very thin slip of paper between the top of the shim and the bottom of the heatsink. If the paper slides through without any resistance, your shim is too thin and won’t transfer heat. If the heatsink is visibly tilted and won’t reach its other mounting posts, the shim is too thick. I remember a long night trying to turn an old work laptop into a powerful media server only to find that a warped heat pipe was creating an uneven gap. The shim acted as a bridge, leveling the contact surface so the thermal energy had a direct, unobstructed path to the exhaust fans.
Building the Thermal Sandwich Step by Step
Once you have confirmed the physical fit, the final assembly is all about layering. Think of this as a ‘thermal sandwich.’ Start by cleaning both the chip and the heatsink surface thoroughly with 99% isopropyl alcohol—this is the most critical step in how to replace your laptop thermal paste without breaking anything. Apply a tiny, almost translucent layer of paste to the CPU die, then carefully place the copper shim on top. Now, apply another small, pea-sized dot of paste on top of the shim itself before lowering the heatsink for the final time. The goal is for the paste to fill the microscopic imperfections in the copper surfaces, not to act as a primary filler. When working on business laptops for professionals, this extra ten minutes of precision work is what separates a quiet, efficient machine from one that throttles during every Zoom call. Always ensure you have your must-have laptop accessories to boost your work setup ready, specifically a high-quality magnetized screwdriver, to avoid dropping screws into the abyss of the motherboard.
People assume that if a laptop has an i9 sticker, it is automatically going to be faster than an i7. This is the most common mistake I see when people are hunting for top laptop deals in 2025. In reality, modern silicon is so power-dense that the chassis design—not the chip—dictates your actual daily speed. I have seen ‘pro’ machines that throttle so hard they drop below the clock speeds of student laptops that balance power and portability perfectly. It is a frustrating reality where you pay for a Ferrari engine but the manufacturer only gave you a one-gallon gas tank to cool it. Have you ever fallen into this trap of buying a laptop based on the CPU sticker alone? Let me know in the comments.
Stop Falling for the Ultra-Thin Portability Trap
The industry has spent a decade convincing us that thinner is always better. However, the hidden cost of buying an ultra-thin gaming laptop is that you are essentially purchasing a performance cap. When a manufacturer shaves 2mm off the chassis, they are usually removing copper heat pipes or reducing the height of the exhaust fans. This leads to a situation where the hardware cannot reach its advertised boost clocks because it hits the 100°C thermal limit within seconds. Independent data from NotebookCheck has repeatedly shown that the same GPU can vary in performance by up to 30% depending solely on the wattage and thermal headroom allowed by the laptop’s frame.

Don’t Let Your Power Adapter Limit Your Frame Rates
The biggest ‘oops’ factor I encounter is when users ignore the Total Graphics Power (TGP) and the wattage of the power brick. You might find a great deal on a machine, but if the manufacturer shipped it with a weak 150W adapter to keep the carry weight down, your high-end hardware will literally starve. This is the real reason your gaming laptop feels sluggish on battery and sometimes even when plugged in—the system simply cannot pull enough current to let the silicon stretch its legs. Always check the wattage of the power supply before you click buy; if it seems small for the specs, the laptop is likely underpowered. This becomes even more critical when looking at game-changing gaming laptops for serious players in 2025 where power draw can exceed 200W.
How do I spot a thermal disaster before hitting the buy button?
To avoid a lemon, look past the CPU and GPU names. Look for the ‘TGP’ rating in the fine print. An RTX 4070 running at 60W will often be slower than an RTX 4060 running at 115W. Additionally, pay attention to the RAM configuration. We have reached a point where software demands are skyrocketing, and why we never buy laptops with soldered RAM for longevity comes down to basic repairability. If you cannot upgrade your memory or reach your fans for a deep clean, that ‘deal’ is going to be e-waste in three years. Always prioritize a slightly thicker chassis with accessible internals over a sleek, sealed-shut ultrabook if you actually plan on doing heavy work or gaming.
The Toolbench Essentials for Every Serious Laptop Owner
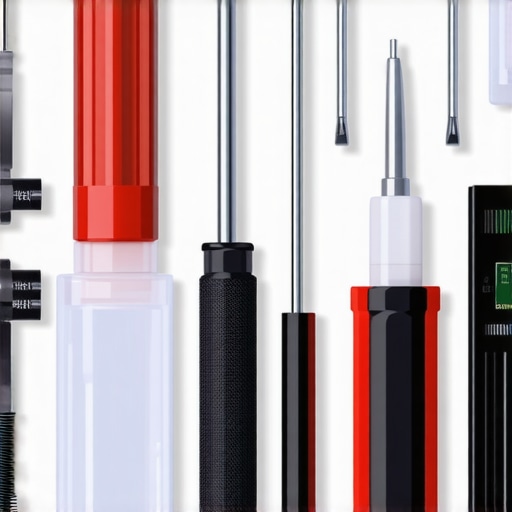
Once you have addressed the hardware gaps and thermal interfaces, you need to maintain that edge with precision tools. I never touch my machines with the cheap, soft-metal screwdrivers that come in those ‘free’ repair kits. One stripped screw on a high-end motherboard can turn a simple upgrade into a nightmare. I personally swear by the iFixit Pro Tech Toolkit for everything from business laptops for professionals to complex gaming rigs. The bit quality ensures you don’t round off the shallow heads common in modern thin-and-light designs. For monitoring, forget the flashy RGB-filled dashboards provided by manufacturers; I use HWiNFO64 exclusively. It provides granular data on every thermal sensor in your system, allowing you to see exactly when and why your clock speeds are dipping. According to technical deep-dives from Igor’s Lab, monitoring ‘Hot Spot’ temperatures rather than just the average CPU package temperature is the only way to truly know if your thermal shim or paste application was successful.
Software Bloat is the New Dust
You can have the cleanest fans in the world, but if your operating system is running fifty background processes, you’re still going to see heat spikes. I see people snag unbeatable laptop deals only to complain about sluggishness three weeks later because of pre-installed ‘safety’ suites and ‘updater’ tools. One of the first things I do is disable Windows features that eat your battery life and remove any telemetry that keeps the CPU from entering its lowest power states. This isn’t just about speed; it’s about longevity. A CPU that stays at 5% idle usage instead of 15% will physically last longer and keep its battery chemistry healthier over time. If you’re noticing weird power drops, don’t ignore it. You should also calibrate your laptop battery for better accuracy every few months to ensure the firmware isn’t lying to you about how much ‘juice’ is actually left in the cells.
How do I maintain peak performance over several years?
The secret to a laptop that still feels fast in 2028 is a strict maintenance schedule. Every six months, I use compressed air to blow out the heatsink fins. Be careful, though; if you don’t hold the fan blades still with a toothpick, the high-pressure air can spin them beyond their rated RPM and ruin the bearings. This is a common reason why your laptop fan only gets louder after cleaning. Looking forward, I predict we are going to see a massive shift toward solid-state cooling solutions, like AirJet chips, which replace traditional fans entirely. This will eventually make our current struggle with dust and thermal paste obsolete. Until then, stay vigilant with your hardware monitoring and don’t be afraid to repaste your machine once a year if you live in a particularly dusty or warm environment.
The Pro Tip for Constant Stability
If you want to truly scale your setup for professional work, stop relying on the built-in ports for high-bandwidth tasks. I always recommend using a dedicated hub from the must-have laptop accessories to boost your work setup list. By offloading the thermal load of video processing and peripheral management to an external powered dock, you reduce the heat generated inside the laptop chassis itself. It sounds minor, but in a three-hour rendering session, it can be the difference between finishing the job or hitting a thermal shutdown. I challenge you to download HWiNFO64 today and check your ‘CPU Package Power’ at idle—if it’s over 10 watts on a modern student laptop, you have work to do in your background processes.
The Hard Truth About My Failed Repair Attempts
Over the years, I’ve realized that the most expensive “fixes” are often the least effective. I spent a fortune on gear before I understood that thermal paste is a bridge, not a blanket. If you have a physical gap between your heat pipe and the CPU die, no amount of premium liquid metal will save you. Secondly, always start with software; knowing how to undervolt your gaming laptop is often the difference between a loud machine and a silent one. Also, remember that manufacturers prioritize assembly speed over thermal perfection. If you find unbeatable laptop deals, expect to do a little ‘finishing work’ yourself to unlock that hidden power. #IMAGE_PLACEHOLDER_E#
The Toolkit I Use to Keep Temperatures Low
If you’re serious about maintenance, you need the right supplies. I don’t go anywhere without my iFixit Pro Tech Toolkit, because as we’ve discussed, why your laptop fan only gets louder after cleaning often comes down to stripped screws or damaged bearings from improper handling. I also rely on K5 PRO viscous thermal putty for VRM cooling, which is a lifesaver when factory pads don’t quite reach the heatsink. For data, skip the flashy manufacturer bloatware and stick to HWiNFO64 to see the real story behind your temps. Finally, keep a bottle of 99% isopropyl alcohol handy; a clean surface is the only way how to replace your laptop thermal paste without breaking anything effectively.
Claim the Performance You Paid For
It’s easy to feel intimidated by the tiny components inside your laptop, but remember that you own the hardware—it shouldn’t own you. By taking these small steps, like shim installation or proper maintenance, you’re extending the life of your investment and ensuring that your game-changing gaming laptops for serious players in 2025 actually live up to the hype on the box. Don’t settle for ‘good enough’ when a few dollars and some patience can make your machine run like a dream. Have you ever tried repasting your own machine, or does the idea of opening the chassis still feel like a nightmare? Let me know in the comments below.