
It was 2 AM, and I was staring at a frozen screen on one of my favorite business laptops while a malware scan slowly confirmed my worst fears. My entire system—from my precious family photos to my sensitive client contracts—was sitting in one giant, messy pile on my C: drive. When the virus hit the operating system, it had a direct path to everything else. I ended up having to wipe the whole drive, losing three days of work and a decade of digital memories. It was a painful, amateur mistake. I used to think that keeping everything on one large partition was ‘easier’ or ‘faster,’ but that night taught me that ease is the enemy of security. Today, I want to show you exactly how to split your digital life into secure, manageable vaults so that an OS crash or a rogue download doesn’t become a total catastrophe. Have you ever had that heart-stopping moment where you realized one bad click could erase everything?
Why Your Data Needs a Room of Its Own
Most people buy a new device from one of those unbeatable laptop deals and just start saving files immediately. It’s tempting. But treating your hard drive like a one-room studio apartment is a security nightmare. When you partition, you are essentially building firewalls inside your storage. By separating your Operating System (OS) from your personal data, you ensure that if Windows or macOS decides to commit digital suicide, your documents stay safely tucked away in their own neighborhood. This isn’t just about organization; it’s about survival. A study by Cybersecurity Ventures notes that ransomware attacks are becoming increasingly sophisticated, often targeting system files first. If your data lives on a separate partition, you can wipe and reinstall your OS in under an hour without ever touching your personal files. It turns a potential week-long disaster into a minor afternoon annoyance.
Is this just more work for no real payoff?
I get it. You might think partitioning sounds like some 90s IT relic that doesn’t apply to modern SSDs. I felt the same way until I realized that the real reason your laptop feels sluggish often stems from a cluttered OS partition that can’t ‘breathe.’ Beyond the security boost, a dedicated data partition makes your backups faster and your system snappier. I made the mistake of ignoring this for years because I was lazy. Don’t be like me. Let’s look at the smartest way to slice your drive for a setup that is both locked down and lightning fast.
Slice Your Drive Without Losing Your Sanity
Think of your hard drive like a house. If you store your lawnmower, your wedding album, and your furnace in the same room, a small fire in the furnace destroys everything. By partitioning, you are building a detached garage for your data. On most business laptops for professionals, the default setup is one giant C: drive. I recommend a surgical split: dedicate 150GB to your Operating System (Windows and your core apps) and leave the rest as a secondary ‘Data’ partition. This keeps your OS lean. I remember the first time I tried this on a refurbished machine I found through the secret to buying laptops directly from lease returns. I didn’t realize that Windows places ‘unmovable’ files at the end of the drive, which initially blocked me from shrinking the volume. I had to disable the hibernation file and run a deep defrag just to move those digital boulders out of the way. It was a mess, but it taught me that your drive needs to be ‘cleaned’ before it can be cut.
Shrink Your Current System to Make Space
Open the Disk Management tool in Windows by right-clicking the Start button. You’ll see your C: drive represented as a long bar. Right-click it and select ‘Shrink Volume.’ Windows will calculate how much ‘free’ space can be carved off into a new partition. If you are using student laptops that boost productivity and learning, you might find that the ‘shrinkable’ space is surprisingly small due to temporary files. Clear your cache first. Once you hit ‘Shrink,’ that space becomes ‘Unallocated’—it’s a ghost territory that exists but can’t hold files yet. 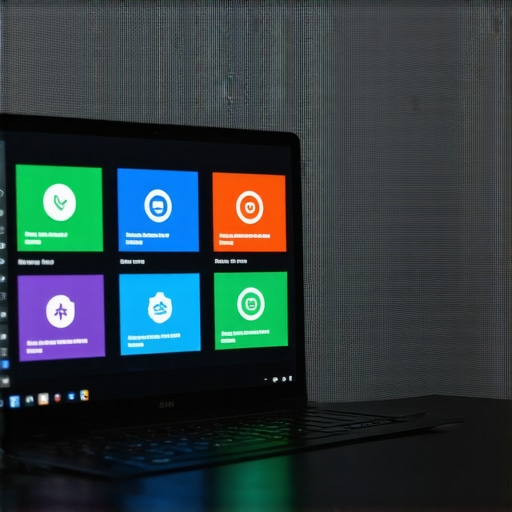
Build the Digital Vault for Your Personal Files
Now, right-click that black ‘Unallocated’ block and choose ‘New Simple Volume.’ Follow the wizard and assign it a letter—I usually go with ‘D’ for Data. This is your new safe room. Format it as NTFS. This separation is vital because if your laptop starts acting up—perhaps the real reason your laptop feels sluggish is a corrupted Windows update—you can wipe that C: partition entirely and reinstall the OS without ever touching the D: drive where your photos and projects live. It’s the ultimate ‘undo’ button for system-level disasters.
Move Your Libraries to Their New Home
Simply having a D: drive isn’t enough; you have to force Windows to use it. Go to your User folder, right-click ‘Documents,’ select ‘Properties,’ and then hit the ‘Location’ tab. Change the path from C:\Users\Name\Documents to D:\Documents. Windows will ask if you want to move all your files there—say yes. Repeat this for Pictures, Videos, and Downloads. If you are setting up game-changing gaming laptops, you can even install your Steam library here. By doing this, you ensure that your system drive stays fast and uncluttered, while your life’s work remains isolated in its own secure, partitioned neighborhood.Every tech YouTuber will tell you that partitioning is a dead art because of cloud storage. They are wrong. While you might be tempted to just sync everything to the cloud on your top business laptops for productivity in 2025, relying solely on OneDrive or Dropbox is a massive security oversight. In my experience, cloud-synced folders are actually more prone to file-system corruption during an OS crash because they are constantly ‘locking’ files for upload. By keeping your local data on a separate physical partition, you decouple your precious files from the volatile sync-engine of the OS. Let’s dig deeper into the nuances that the basic guides always miss.
The BitLocker Trap That Could Lock You Out Forever
Here is a specific warning that has ruined many weekends: the encryption trap. Most modern must-have laptop accessories for a seamless setup focus on hardware, but the real danger is software-based. When you create a new partition, Windows often automatically applies BitLocker encryption to it. If you wipe your C: drive to reinstall Windows and you haven’t manually backed up that 48-digit recovery key, your D: drive becomes a digital brick. I have seen professionals lose years of data because they assumed the ‘vault’ was tied to their hardware—it’s not; it’s tied to the specific OS installation. Always go to ‘Manage BitLocker’ and save that key to a physical USB drive before you start slicing your storage. 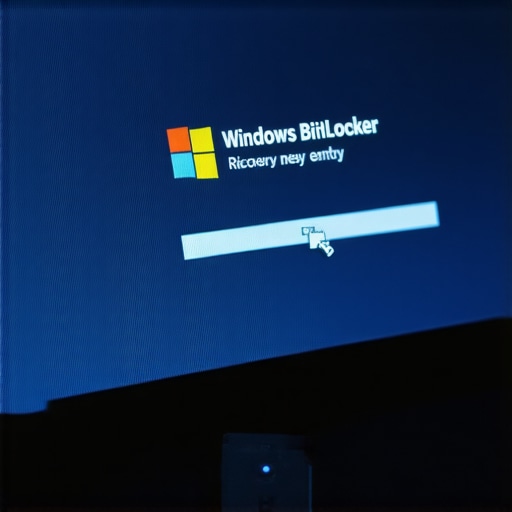
Does Partitioning Actually Hurt Your SSD Performance?
This is the advanced question I get most often from the enthusiast crowd. The common myth is that partitioning an SSD is useless because, unlike old HDDs, there’s no physical ‘head’ moving across a platter. However, research by Kingston Technology highlights that while logical partitioning doesn’t affect physical wear leveling, it does impact how the OS handles ‘over-provisioning’—the secret sauce that keeps SSDs fast. If you fill your system partition to 99%, even if your data partition is empty, the OS will start to choke because it lacks the temporary space for maintenance tasks. This is the real reason your laptop feels sluggish after three months. You need to leave at least 20% of your C: drive as ‘unallocated’ or empty space to allow the controller to perform its background magic.
Why Your Gaming Rig Needs This More Than Your Office PC
People often think why your new gaming laptop feels slower than your old desktop is just down to thermals, but it’s often about I/O overhead. When you are gaming, the OS is constantly writing small log files and temporary telemetry to the C: drive. If your massive 100GB game files are on that same partition, the drive controller has to juggle system requests and game-asset loading simultaneously. By moving your library to a dedicated partition, you can actually reduce micro-stutters during heavy gameplay. It’s a similar logic to how to undervolt your gaming laptop for better temps and performance—it’s all about efficiency. Have you ever fallen into the trap of losing a recovery key or seeing your performance tank after a partition? Let me know in the comments below.
Partitioning is just the first step in a long-term relationship with your hardware. If you don’t maintain those boundaries, they’ll eventually blur or break. I learned the hard way that a ‘set it and forget it’ attitude is how you end up with a drive that is technically separated but practically broken. When you’re hunting for top laptop deals in 2025, you aren’t just buying a screen and a CPU; you’re buying a storage controller that needs to be managed with surgical precision.
Stop Ignoring the Health of Your Storage
Every quarter, I perform what I call the ‘Digital Audit.’ I use CrystalDiskInfo to check the S.M.A.R.T. status of my drive. Most people ignore this until they see a ‘Drive Not Found’ error, but that’s like waiting for your engine to explode before checking the oil. According to the 2023 Backblaze Drive Stats report, SSD failure rates often correlate with specific controller firmware versions and temperature spikes. If your drive is running hot, no amount of partitioning will save your data. This is why I often suggest users learn how to replace your laptop thermal paste without breaking anything, especially if you have a thin-and-light machine that handles heavy I/O tasks. Keeping the internal temperature down isn’t just about the processor; it protects the delicate NAND cells on your SSD from premature wear. Don’t be fooled into thinking why most laptop cooling pads are just loud paperweights—real cooling happens inside the chassis, not from a plastic fan sitting underneath it.
How Do I Keep My Partitioned System Running Smoothly?
The secret is scheduled imaging. I personally use Macrium Reflect (the free version still works wonders for home users) to create a bit-for-bit image of my C: drive every month. Because my C: drive is only 150GB, the image is small and transfers to an external drive in minutes. If I ever catch a virus or a Windows update goes rogue, I don’t troubleshoot; I just blast the image back onto the partition and I’m back to work in six minutes. This is one of those must-have laptop accessories for a seamless setup that no one talks about: a dedicated, high-quality external SSD specifically for your system images. Just be careful when buying storage online and learn how to spot a fake nvme drive on amazon, because a fraudulent drive will fail the moment you actually need to recover from it.
The Software Stack That Saves My Sanity Every Time
Beyond imaging, you need a way to keep those folders organized without the ‘Library’ system breaking. I use a tool called ‘Link Shell Extension.’ It allows you to create symbolic links—basically portal-like shortcuts—that tell Windows a folder is on C: when it’s actually sitting safely on your D: partition. This is the pro way to handle apps that refuse to be installed anywhere but the system drive. Looking forward, I predict we will see more ‘Unified Memory’ architectures where the line between RAM and storage blurs even further. This makes physical partitioning even more critical because the OS will try to use your storage as virtual memory more aggressively. If your C: drive is too small or too cluttered, you’ll see immediate performance drops. My advice? Go check your BitLocker settings right now and print out that recovery key. It’s the single most common reason people lose their partitioned data. Do it today before your next reboot turns into a lockout.
What Most Guides Forget to Tell You About Drive Management
Partitioning is more than a technical hurdle; it’s a mindset shift. One thing I realized after years of tinkering is that your storage configuration is just as important as the raw specs when you’re hunting for unbeatable laptop deals. If you don’t control where your data lives, the OS eventually will—and it’s not a gentle landlord. Here are the lightbulb moments that changed how I view my drives:
- The 20% Rule: Never let your C: partition exceed 80% capacity. SSDs need that ‘slack’ space for wear leveling. This is often the real reason your laptop feels sluggish after three months, not the processor.
- Software vs. Hardware: A logical partition on a single physical SSD is great for OS reinstallation, but it isn’t a backup for physical failure. You still need an external vault.
- Symbolic Links are Magic: You can move massive folders like ‘Downloads’ to your D: drive while making Windows think they are still on C:, keeping your system paths intact.
The Software That Actually Makes Partitioning Useful
I don’t trust the built-in Windows tools for everything. To really manage a high-end system, you need a specific toolkit. I personally rely on Macrium Reflect for creating bit-for-bit images of my system partition. If a Windows update breaks my registry, I just roll back to a two-week-old image. For monitoring the physical health of my NAND cells, CrystalDiskInfo is non-negotiable. It tells you exactly how many ‘terabytes written’ your drive has left before it retires. Finally, I recommend a high-quality external drive from our list of must-have laptop accessories for a seamless setup to store these images. If you’re looking for the best way to port your files to a new student laptop without cloud storage, an imaged partition is the fastest way to travel.
Build a System That Survives the Next Crash
Don’t be afraid to click that ‘Shrink Volume’ button. It feels intimidating the first time, but taking control of your drive layout is the ultimate pro move for anyone using top business laptops for productivity in 2025. You are effectively building a disaster-proof digital home where your personal memories and professional projects are no longer held hostage by a temperamental operating system. Whether you are optimizing student laptops that boost productivity and learning or a high-end gaming rig, this separation is your best defense against the unknown. Have you ever accidentally wiped your main drive because everything was stored in one giant partition? Let me know in the comments below.