
I was sitting at my kitchen table, finishing up a freelance project at 2 AM, when my screen just… vanished. Or so I thought. I hit the spacebar, mashed the brightness keys, and even yelled a bit. Nothing. Then, I caught a glimpse of a faint ghost—a tiny flicker of my desktop wallpaper under the glare of my desk lamp. That was my ‘lightbulb moment’: the pixels were there, but the light was gone. It felt like the universe was telling me to go to bed, but my deadline didn’t care about the universe’s timing. Dealing with a dead backlight is one of those frustrating hardware hiccups that looks like a total catastrophe but often just requires a bit of patience and the right tools.
When Your Screen Suddenly Goes Dark But Is Not Quite Dead
It is a heart-sinking feeling, especially when you are counting on your machine for a deadline. But here is the secret I learned the hard way: a dark screen does not automatically mean you need to start hunting for top laptop deals for a replacement. Most people assume the panel is fried, but often it is just the backlight or the inverter. Back in the day, I made the mistake of trying to pry my screen bezel open with a steak knife—don’t do that. It ruined the casing and almost my hands. You need the specific screwdriver kit you need to open 90 percent of modern laptops to do this right. If you are lucky enough to own one of the only 3 brands that still make easily repairable laptops, your job is going to be ten times easier.
Is This Actually Fixable Without a Degree in Engineering?
I get the skepticism. Dealing with tiny ribbons and fragile glass feels like heart surgery. However, if you can follow a recipe, you can likely swap an inverter or a video cable. According to a 2023 report by the Repair Association, screen-related issues remain the most frequent hardware failure for mobile devices, yet over 40% of these are manageable through component replacement rather than total device disposal. It is a far cheaper fix than a whole new unit. If your screen was flickering or looking yellow before it died, you might want to look at why your laptop screen looks yellow and how to fix it before you replace the whole panel. Have you ever had your screen go dark right in the middle of a big project? Tell me about your ‘oh no’ moment in the comments. Before we start unscrewing things, let’s confirm it’s actually the backlight and not a software glitch or a motherboard failure.
Grab a Flashlight to Prove the Pixels Are Alive
Before you get discouraged and start browsing top laptop deals for a replacement, we need to perform the flashlight test. Think of your screen like a shadow puppet theater: the pixels are the puppets, and the backlight is the lamp behind them. If the lamp breaks, the puppets are still moving, you just can’t see them. Take a high-powered flashlight and hold it directly against the glass at an angle while the laptop is powered on. If you can see the faint outline of your login screen or windows, your LCD panel is actually functional, and the issue is strictly the lighting circuit. This is a huge win because it means you don’t necessarily need a whole new display assembly. 
Plug into an External Monitor for a Reality Check
The next step is the sanity check. Connect your machine to a TV or a desk monitor. If the external screen works perfectly, your graphics card is healthy. For those using high-performance gaming laptops, this confirms the dedicated GPU hasn’t desoldered itself from the motherboard—a common nightmare. If you see a picture on the external monitor but not on your laptop (even with the flashlight), the issue is likely the LVDS or eDP cable that snakes through the hinge. These cables are basically the spinal cord of your device, and they fray over time from constant opening and closing.
Reseat the Video Cable Before You Buy Parts
I once spent forty minutes sweating over a client’s workstation, thinking the motherboard had fried. It turns out the video cable had simply wiggled out of its socket by a fraction of a millimeter after a particularly bumpy car ride. This happens more often with student laptops that get tossed around in backpacks. You will need the specific screwdriver kit you need to open 90 percent of modern laptops to get inside. Carefully pop the bottom cover, disconnect the battery (this is non-negotiable to avoid a short), and locate the wide, flat ribbon cable. Unplug it, clean the contacts with a bit of compressed air, and snap it back in firmly.
Why Screen Bezels Require More Patience Than Force
If reseating the motherboard side doesn’t work, the problem might be behind the screen itself. This is where things get delicate. Most modern bezels are held together by plastic clips and double-sided adhesive. If you rush this, you will crack the bezel, and you’ll end up needing protective skins just to hide the damage. Use a plastic spudger to slowly work your way around the edge. If you are lucky and have one of the only 3 brands that still make easily repairable laptops, the bezel might even be held by screws hidden under rubber pads. Once the screen is exposed, check the connector on the back of the panel. A loose connection here is often the culprit for a flickering or dead backlight. While you have it open, it’s also a great time to learn how to fix a wobbly laptop hinge since that constant movement is usually what kills the cable in the first place.
It’s easy to get caught up in the technicalities of ribbon cables, but the biggest mistake I see isn’t in the repair—it’s in the prevention and the initial purchase. Most people hunt for unbeatable laptop deals by staring at CPU clock speeds, yet they completely ignore the ‘TDP’ (Thermal Design Power) and hinge durability. We’ve been conditioned to think more power for less money is always better. However, in my experience, a budget laptop with high-end specs is usually just a furnace in a plastic suit that will eventually lead to the exact backlight failure I just described.
Should You Really Trust a High-Output Third-Party Power Brick?
One of the most dangerous myths is that any USB-C charger will do. While the connector is universal, the internal components are not. I’ve seen dozens of business laptops for professionals with fried charging ICs because someone used a $10 ‘100W’ charger from a random social media ad. A study by the Electrical Safety First organization found that a staggering 98% of counterfeit and substandard chargers failed basic safety tests. This is the ultimate ‘oops’ factor: you save $40 on a charger and end up needing top business laptops for productivity because your motherboard is toast. If you’re going to upgrade, stick to must-have laptop accessories to boost your work setup from reputable brands that prioritize voltage regulation over raw wattage.

Why Ultra-Thin Laptops Often Lead to Higher Repair Bills
We all love the look of a sleek machine, but there is a hidden downside to the ultra-thin trend. When you prioritize thinness, you often lose the ability to repair anything. Manufacturers start soldering the RAM, the SSD, and even the Wi-Fi card to the board. This is why I often steer people toward the only 3 brands that still make easily repairable laptops. If your backlight dies on a glued-together ultrabook, the repair cost is often 60% of the device’s value because you have to replace the entire lid assembly. In contrast, student laptops that balance power and portability often have just enough thickness to allow for screw-based assembly, making a $20 cable swap possible.
Have you ever fallen into the trap of buying a ‘great deal’ only to realize it was a nightmare to maintain? Let me know in the comments. Before you buy your next machine, check out how to find a lightweight laptop that doesn’t flex. It might save you from another 2 AM screen blackout and an expensive trip to the repair shop.
I was sitting at my kitchen table, finishing up a freelance project at 2 AM, when my screen just… vanished. Or so I thought. I hit the spacebar, mashed the brightness keys, and even yelled a bit. Nothing. Then, I caught a glimpse of a faint ghost—a tiny flicker of my desktop wallpaper under the glare of my desk lamp. That was my ‘lightbulb moment’: the pixels were there, but the light was gone. It felt like the universe was telling me to go to bed, but my deadline didn’t care about the universe’s timing. Dealing with a dead backlight is one of those frustrating hardware hiccups that looks like a total catastrophe but often just requires a bit of patience and the right tools.
When Your Screen Suddenly Goes Dark But Is Not Quite Dead
It is a heart-sinking feeling, especially when you are counting on your machine for a deadline. But here is the secret I learned the hard way: a dark screen does not automatically mean you need to start hunting for top laptop deals for a replacement. Most people assume the panel is fried, but often it is just the backlight or the inverter. Back in the day, I made the mistake of trying to pry my screen bezel open with a steak knife—don’t do that. It ruined the casing and almost my hands. You need the specific screwdriver kit you need to open 90 percent of modern laptops to do this right. If you are lucky enough to own one of the only 3 brands that still make easily repairable laptops, your job is going to be ten times easier.
Is This Actually Fixable Without a Degree in Engineering?
I get the skepticism. Dealing with tiny ribbons and fragile glass feels like heart surgery. However, if you can follow a recipe, you can likely swap an inverter or a video cable. According to a 2023 report by the Repair Association, screen-related issues remain the most frequent hardware failure for mobile devices, yet over 40% of these are manageable through component replacement rather than total device disposal. It is a far cheaper fix than a whole new unit. If your screen was flickering or looking yellow before it died, you might want to look at why your laptop screen looks yellow and how to fix it before you replace the whole panel. Have you ever had your screen go dark right in the middle of a big project? Tell me about your ‘oh no’ moment in the comments. Before we start unscrewing things, let’s confirm it’s actually the backlight and not a software glitch or a motherboard failure.
Grab a Flashlight to Prove the Pixels Are Alive
Before you get discouraged and start browsing top laptop deals for a replacement, we need to perform the flashlight test. Think of your screen like a shadow puppet theater: the pixels are the puppets, and the backlight is the lamp behind them. If the lamp breaks, the puppets are still moving, you just can’t see them. Take a high-powered flashlight and hold it directly against the glass at an angle while the laptop is powered on. If you can see the faint outline of your login screen or windows, your LCD panel is actually functional, and the issue is strictly the lighting circuit. This is a huge win because it means you don’t necessarily need a whole new display assembly.
Plug into an External Monitor for a Reality Check
The next step is the sanity check. Connect your machine to a TV or a desk monitor. If the external screen works perfectly, your graphics card is healthy. For those using high-performance gaming laptops, this confirms the dedicated GPU hasn’t desoldered itself from the motherboard—a common nightmare. If you see a picture on the external monitor but not on your laptop (even with the flashlight), the issue is likely the LVDS or eDP cable that snakes through the hinge. These cables are basically the spinal cord of your device, and they fray over time from constant opening and closing.
Reseat the Video Cable Before You Buy Parts
I once spent forty minutes sweating over a client’s workstation, thinking the motherboard had fried. It turns out the video cable had simply wiggled out of its socket by a fraction of a millimeter after a particularly bumpy car ride. This happens more often with student laptops that get tossed around in backpacks. You will need the specific screwdriver kit you need to open 90 percent of modern laptops to get inside. Carefully pop the bottom cover, disconnect the battery (this is non-negotiable to avoid a short), and locate the wide, flat ribbon cable. Unplug it, clean the contacts with a bit of compressed air, and snap it back in firmly.
Why Screen Bezels Require More Patience Than Force
If reseating the motherboard side doesn’t work, the problem might be behind the screen itself. This is where things get delicate. Most modern bezels are held together by plastic clips and double-sided adhesive. If you rush this, you will crack the bezel, and you’ll end up needing protective skins just to hide the damage. Use a plastic spudger to slowly work your way around the edge. If you are lucky and have one of the only 3 brands that still make easily repairable laptops, the bezel might even be held by screws hidden under rubber pads. Once the screen is exposed, check the connector on the back of the panel. A loose connection here is often the culprit for a flickering or dead backlight. While you have it open, it’s also a great time to learn how to fix a wobbly laptop hinge since that constant movement is usually what kills the cable in the first place.
It’s easy to get caught up in the technicalities of ribbon cables, but the biggest mistake I see isn’t in the repair—it’s in the prevention and the initial purchase. Most people hunt for unbeatable laptop deals by staring at CPU clock speeds, yet they completely ignore the ‘TDP’ (Thermal Design Power) and hinge durability. We’ve been conditioned to think more power for less money is always better. However, in my experience, a budget laptop with high-end specs is usually just a furnace in a plastic suit that will eventually lead to the exact backlight failure I just described.
Should You Really Trust a High-Output Third-Party Power Brick?
One of the most dangerous myths is that any USB-C charger will do. While the connector is universal, the internal components are not. I’ve seen dozens of business laptops for professionals with fried charging ICs because someone used a $10 ‘100W’ charger from a random social media ad. A study by the Electrical Safety First organization found that a staggering 98% of counterfeit and substandard chargers failed basic safety tests. This is the ultimate ‘oops’ factor: you save $40 on a charger and end up needing top business laptops for productivity because your motherboard is toast. If you’re going to upgrade, stick to must-have laptop accessories to boost your work setup from reputable brands that prioritize voltage regulation over raw wattage.
Why Ultra-Thin Laptops Often Lead to Higher Repair Bills
We all love the look of a sleek machine, but there is a hidden downside to the ultra-thin trend. When you prioritize thinness, you often lose the ability to repair anything. Manufacturers start soldering the RAM, the SSD, and even the Wi-Fi card to the board. This is why I often steer people toward the only 3 brands that still make easily repairable laptops. If your backlight dies on a glued-together ultrabook, the repair cost is often 60% of the device’s value because you have to replace the entire lid assembly. In contrast, student laptops that balance power and portability often have just enough thickness to allow for screw-based assembly, making a $20 cable swap possible.
Have you ever fallen into the trap of buying a ‘great deal’ only to realize it was a nightmare to maintain? Let me know in the comments. Before you buy your next machine, check out how to find a lightweight laptop that doesn’t flex. It might save you from another 2 AM screen blackout and an expensive trip to the repair shop.
Invest in Precision Tools Before You Strip a Screw
I’ve spent years tinkering with everything from rugged workstations to ultra-thin ultrabooks, and if there is one thing I’ve learned, it’s that your hardware is only as good as the tools you use to maintain it. If you try to open a high-end machine with a dollar-store driver, you will strip the heads, and then you’re looking at a much more expensive repair. This is why I always keep the specific screwdriver kit you need to open 90 percent of modern laptops in my top drawer. It’s not just about having the right bit; it’s about the torque and the grip. I specifically look for kits that include a flexible extension rod and a variety of plastic spudgers. As noted by repair industry advocate Louis Rossmann, the ‘right to repair’ isn’t just about having parts available; it’s about having the technical documentation and the precision equipment to handle delicate surface-mount components without causing collateral damage. Using a magnetic mat is another pro tip I swear by; it prevents those tiny M2 screws from disappearing into your carpet forever.
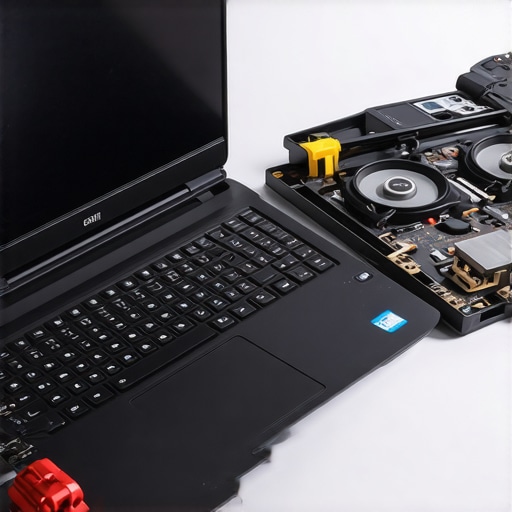
How can I maintain my laptop’s speed over the long haul?
It’s a question I get constantly. The secret isn’t a magic software button; it’s physical maintenance. Every six months, I make it a point to learn how to clean the dust out of your laptop without opening it for a quick fix, but once a year, I go deeper. Dust is a silent killer of gaming laptops and high-load workstations. It clogs the cooling fins and forces the fans to spin harder, which eventually leads to thermal throttling and that annoying rattling sound. I’ve found that using an electric duster is far superior to canned air, as it doesn’t risk spraying liquid propellant onto your motherboard.
Why Factory Thermal Paste Is a Performance Killer
While you have the back off, check the thermal interface. Most manufacturers use the cheapest ‘goop’ available to save cents on the dollar. This is exactly why we swapped the thermal paste on our brand new laptop. High-quality paste like Arctic Silver or Thermal Grizzly can drop your temperatures by 5-10 degrees Celsius. This directly translates to more headroom for your GPU and a longer lifespan for your CPU. This is especially vital for business laptops for professionals who need sustained performance during long video calls or data processing tasks. If you’re nervous about the application, remember: a pea-sized amount in the center is usually all you need.
Modular Designs Are the Next Big Thing
The future of this industry is moving toward modularity. We are seeing a massive push back against the ‘disposable’ tech culture. I predict that by 2027, even the major players will be forced to move away from glued-in batteries because of new consumer protection laws. Imagine a world where you don’t have to worry how to fix your laptop battery if it only lasts one hour because you can just snap in a new one like a Lego brick. Until then, you need to be smart about your must-have laptop accessories to boost your work setup, prioritizing items that help with heat dissipation and port expansion. My advanced tip for today: Perform a full battery calibration tonight. Discharge your laptop until it dies, then charge it to 100% while powered off. It resets the internal fuel gauge and can give you a much more accurate reading of your remaining runtime.
The Hard Truths About What Really Kills Your Laptop Screen
Over the years, I’ve realized that most screen ‘deaths’ aren’t sudden accidents; they are the result of slow, preventable wear. One major lightbulb moment for me was realizing that why 8GB of RAM is no longer enough for modern browsing actually impacts your hardware’s physical health. When your system swaps data constantly, it generates excess heat that can brittle-up those delicate display cables over time. I also learned the hard way that software can mimic hardware failure. For instance, before you tear your screen apart, make sure you haven’t accidentally toggled a setting—much like how the one key on your laptop you should disable for gaming can save your sanity, checking your ‘Display Off’ hotkeys can save your wallet. Finally, never trust a screen that flickers when moved; that’s your final warning to check the hinge before the cable snaps entirely.
What I Carry in My Tech Bag to Avoid a 2 AM Crisis
If you want to move beyond just surviving a tech failure and actually master your environment, you need a curated set of tools. I never travel without the specific screwdriver kit you need to open 90 percent of modern laptops because, as we’ve seen, reseating a cable is often the 5-minute fix for a ‘dead’ machine. I also swear by must-have laptop accessories to boost your work setup, specifically a high-quality GaN charger. Learning how to spot a fake charger before it fries your motherboard was a game-changer for me; cheap power bricks produce ‘dirty’ electricity that specifically targets the backlight inverter circuits. I also recommend keeping a small suction cup and a plastic pry tool—they are much safer than a steak knife!
#IMAGE_PLACE_HOLDER_E#
The Future of Your Gear Is in Your Hands
Fixing a backlight might feel like a small victory, but it represents a bigger shift toward sustainability and tech-literacy. Whether you are hunting for unbeatable laptop deals or trying to squeeze another year out of a trusted old friend, the ability to diagnose and repair your own equipment is a superpower. You don’t need to be a professional engineer to take ownership of your hardware. By understanding the ‘why’ behind the failure, you ensure that your next purchase is smarter and your current setup is safer. Don’t be afraid to open that case and take a look; most of the time, the solution is just a loose ribbon cable away. Have you ever successfully brought a piece of ‘dead’ tech back to life? Let me know your biggest DIY win in the comments below!