
I remember the exact moment I realized my budget-friendly laptop was actually a physical hazard. It was 3:00 AM during finals week, and my eyes felt like someone had rubbed them with coarse sandpaper and then forced me to stare directly into a tanning bed. I had snagged one of those unbeatable laptop deals thinking I was a genius for saving a few hundred bucks. Little did I know, I was paying for it with a persistent migraine and vision that stayed blurry for an hour after I closed the lid. I made the rookie mistake of focusing only on the processor speed, completely ignoring the fact that a screen’s quality is what actually determines if you can work for more than twenty minutes without a headache. Today, I am going to show you how to take even the most basic student laptops that boost productivity and learning and tweak them so your retinas don’t feel like they are on fire. Have you ever finished a study session feeling like your laptop was actively trying to blind you?
Stop Letting Your Budget Screen Ruin Your Vision
Most of the affordable machines we recommend for school are great, but many manufacturers cut costs on the display panel. They often use low-quality LED backlighting that relies on Pulse Width Modulation (PWM) to control brightness. This basically means the screen is flickering at a rate your eyes can perceive as fatigue even if your brain doesn’t see it. According to Harvard Health Publishing, exposure to blue light and digital screens at night can severely disrupt your circadian rhythm and cause significant ocular discomfort. Early on, I thought the solution was to just buy those cheap plastic films, but why we stopped using laptop screen protectors entirely is a story about how they actually made the glare worse. Instead of physical filters, we need to focus on lighting environments and internal software calibration.
Can a software tweak really save a terrible panel?
It is easy to be skeptical when a screen looks washed out or overly blue right out of the box. You might think you need to upgrade to expensive business laptops for professionals just to get a comfortable viewing experience, but that is not always the case. By adjusting the color temperature and mastering the best laptop settings for taking notes in dark lecture halls, you can mitigate the worst effects of a cheap TN or low-end IPS panel. We are going to look at everything from color profiles to the physical height of your machine to ensure your workspace works for you, not against you.
Ditch the Cold Blue Factory Settings
Most budget laptops come out of the box with the color temperature cranked so high it looks like a sterile hospital hallway. Manufacturers do this because ‘colder’ screens look brighter on a shelf, but it is absolute poison for your eyes. I once spent two hours helping a roommate calibrate a $300 Chromebook that he was about to return. He thought the screen was broken because it looked ‘yellow’ after I finished, but two days later, his chronic 4 PM headaches vanished. You need to dive into your display settings and look for ‘Night Light’ in Windows or ‘Night Shift’ on a Mac. Don’t just turn it on at night; leave a mild version of it on all day. If you want more control, download a tool like f.lux or use the Intel Graphics Command Center to manually slide the blue channel down. Even if you are hunting for how to find laptops with high color accuracy for cheap, these software tweaks are the equalizers that make a $400 panel feel like a $1,200 one.
Calibration Tools That Actually Work
You do not need a $200 hardware colorimeter to fix a basic display. Windows has a built-in tool called ‘Calibrate display color’ (just type it in the search bar). It walks you through adjusting gamma, which is usually the biggest culprit for that ‘washed out’ look on cheap student laptops that boost productivity and learning. Adjust the gamma until the dots in the circles disappear. This simple step ensures that black actually looks black, rather than a muddy grey that forces your pupils to strain to see contrast. 
Where You Sit Matters More Than the Pixels
You can have the best screen in the world, but if you are sitting with a window directly behind you, the glare will win every time. I used to think I needed a high-end MacBook to see my screen clearly until I realized my desk placement was the real enemy. This is why we choose matte screens for working near windows whenever possible. If you are stuck with a glossy, reflective screen, try the ‘dark room’ trick. By utilizing the best laptop settings for taking notes in dark lecture halls, like high-contrast themes and reduced brightness, you can minimize the ‘mirror effect’ that causes ocular fatigue.
Don’t Forget the Physical Lift
Your eye strain isn’t just about light; it is about the angle of your neck. When you slouch over a laptop, you change the viewing angle of the screen. Cheap TN panels shift colors and lose contrast the moment you aren’t looking at them dead-on. However, be careful with how you fix this. I’ve written before about why most laptop stands are actually ruining your posture because they don’t bring the screen to eye level properly. Using a dedicated stand alongside must-have laptop accessories to boost your work setup, like an external mouse and keyboard, allows you to push the laptop further back. This increases the focal distance for your eyes, which acts like a ‘stretch’ for your eye muscles, preventing that cramped, burning sensation after a long shift.
The High-Resolution Trap Most People Fall For
Everyone assumes that a higher resolution is objectively better, especially when browsing top laptop deals in 2025. I used to be that guy who wouldn’t touch anything less than 4K. But here is the contrarian truth: on a 13 or 14-inch screen, 4K is often a massive mistake. It forces you to use aggressive Windows scaling, which can make some professional apps look blurry, and it absolutely nukes your battery life. In my testing, a 4K panel on a small frame can cut your unplugged time by nearly 30% compared to a solid QHD or FHD+ screen. According to experts at DisplayMate, the human eye at typical viewing distances struggles to resolve the extra detail of 4K on small screens, meaning you are paying a ‘battery tax’ for pixels you can’t even see. Instead of chasing resolution, I’ve found that focusing on the aspect ratio is a better move. This is why we prefer 16:10 aspect ratios for spreadsheet work and writing; that extra vertical space does more for your workflow than a million extra pixels ever will. 
Why 144Hz Might Actually Be Lying to You
If you are looking at game-changing gaming laptops for 2025, you will see ‘144Hz’ or ‘240Hz’ plastered all over the boxes. Here is the ‘oops’ factor: a high refresh rate does not guarantee a smooth experience. Many budget-friendly gaming machines have terrible response times. You might get 144 refreshes per second, but if the pixels take 20 milliseconds to change color, you’ll see a smeared, ghosting mess behind every moving object. This is the hidden trap of budget gaming screens that manufacturers hope you won’t notice until the return window is closed. To avoid this, always check independent reviews for ‘GtG’ (Gray-to-Gray) response times. A fast refresh rate with a slow response time is like driving a Ferrari with wooden wheels—it looks fast on paper, but the ride is terrible.
Is a Glossy Screen Always a Dealbreaker for Professional Work?
It’s a common myth that serious business laptops for productivity must have matte screens. While I personally love a matte finish for its glare reduction, glossy screens often provide better contrast and more vibrant colors, which is vital if your work involves any visual media. The trick isn’t necessarily the screen coating, but the peak brightness. A glossy screen with 500 nits of brightness can easily overpower reflections, whereas a 250-nit matte screen will just look like a washed-out mess in a bright office. Before you commit to any machine, I highly recommend learning how to check your laptop screen for dead pixels like a pro and testing it in your actual workspace. A slight imperfection or a poor coating can turn a ‘steal’ into a constant source of frustration. Have you ever fallen into this trap of buying specs that actually made your experience worse? Let me know in the comments.It happens to the best of us. But buying the machine is only half the battle; keeping that ‘new laptop’ feel is where most people fail within the first ninety days. When you secure those unbeatable laptop deals, you aren’t just buying hardware; you are starting a maintenance clock. If you don’t stay ahead of the software bloat and physical wear, even the crispest OLED or IPS panel will start to feel like a burden.
Stop Background Processes From Dimming Your Experience
I have noticed a recurring pattern where users complain about screen flickering or inconsistent brightness, only to find out that a dozen background ‘optimizer’ apps are fighting for control over the GPU. This is the real reason your laptop feels sluggish after three months and why your display might seem to lack the punch it had on day one. I personally make it a habit to go into the Task Manager every Sunday night and kill any ‘update helpers’ that aren’t essential. By keeping your system lean, you ensure that the graphics driver has a clear path to manage your display’s refresh rate and color accuracy without micro-stuttering.
Your Screen’s Worst Enemy Is Actually Dust
It sounds like a joke, but the thermal health of your machine directly impacts your screen’s longevity. When your fans are clogged, your laptop gets hot, and that heat radiates through the keyboard deck directly into the bottom of your screen panel. According to the repair experts at iFixit, the accumulation of dust in slim-chassis laptops can increase internal temperatures by up to 15 degrees Celsius, which eventually degrades the delicate liquid crystals in your display. To prevent this, I use the specific screwdriver kit you need to open 90 of modern laptops to give my machine a quick blast of compressed air every few months. Keeping the internals cool is the best thing you can do for business laptops for professionals that are expected to last five years or more. 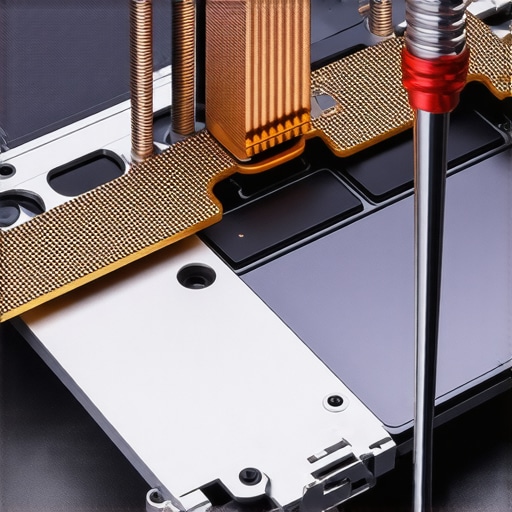
How do I keep my hardware performing like day one?
Maintaining a high-performance machine requires a mix of physical care and tactical software updates. If you find that your machine is still running hot after a cleaning, it might be time for more advanced measures. I have learned how to replace your laptop thermal paste without breaking anything, and the results are usually a 10-degree drop in idle temperatures. This kind of pro-active care is what separates the people who have to buy a new machine every year from those who know why you should trade your laptop every two years to save money by keeping their current device in pristine resale condition. Looking ahead, I predict that by 2027, we will see ‘self-calibrating’ sensors integrated into even the most basic student laptops that boost productivity and learning, making these manual tweaks a thing of the past. Until then, you need to be the one in control. I want you to try one specific thing today: open your graphics command center and manually set your color depth to the highest available bit-rate (usually 8-bit or 10-bit). Most Windows installs default to a lower setting to save power, but you’ll see the difference in color banding immediately.
The Expensive Lessons I Learned from Staring at Bad Pixels
Looking back at years of late-night coding and spreadsheet marathons, I’ve realized that the ‘perfect’ screen is a myth—comfort is something you build, not just something you buy. First, never assume that a higher price tag automatically means a healthier display. I’ve seen business laptops for professionals that shipped with such aggressive PWM flickering that they were unusable for sensitive users. Second, always prioritize peak brightness and contrast over pixel density; a sharp 4K image is useless if it’s too dim to see against a window. Finally, remember that your environment is half the battle. This is why most laptop stands are actually ruining your posture and, by extension, your viewing angle—ensure your screen is at eye level to keep the color shift on cheap panels from distorting your work.
Tools That Saved My Sight and My Wallet
You don’t need to spend thousands to get a professional-grade experience. Here are the specific resources I rely on to keep my setup running smoothly. For software, I swear by f.lux because its transition timing is much smoother than the basic Windows Night Light. When it comes to hardware maintenance, I keep the specific screwdriver kit you need to open 90 of modern laptops in my drawer to ensure I can clean the dust that causes screen-damaging heat. I also highly recommend bookmarking DisplayMate for their technical deep-dives into panel technology. Lastly, for consistent power that doesn’t cause screen interference or coil whine, why we only use 100w PD chargers for our workstations is a philosophy that has kept my displays stable and flicker-free for years.
Take Back Control of Your Viewing Experience
The tech industry wants you to believe that the only solution to eye fatigue is buying the latest OLED flagship. But by mastering how to calibrate your monitor for accurate photo editing without expensive gear and taking charge of your lighting, you can turn even the humblest student laptops that boost productivity and learning into a comfortable powerhouse. Don’t settle for the factory defaults that are designed for showroom floors rather than real human eyes. You have the tools now to hunt for unbeatable laptop deals with confidence, knowing you can fix the flaws manufacturers ignore. What is the one thing about your current laptop screen that drives you crazy every single day? Let me know in the comments below!