
I was about three hours into a deep-work session on a complex spreadsheet when I saw it—a tiny, neon-green speck mocking me from the center of my display. At first, I thought it was just a piece of dust, a stray crumb from lunch, but as I frantically tried to wipe it away, the cold reality sank in: I had a stuck pixel. It felt like a total disaster for my brand-new machine, and honestly, I nearly spiraled into searching for unbeatable laptop deals just to justify replacing the whole unit. But before you panic or consider spending hundreds on a professional screen replacement, let me tell you from experience that there is a way to handle this without losing your mind or your savings.
Don’t Make the Same Messy Mistake I Did
Years ago, when I first encountered this on one of my favorite business laptops, I did exactly what every ‘expert’ on those old 2005-era forums told me to do: I grabbed a microfiber cloth and a pencil eraser and started ‘massaging’ the screen with way too much force. I ended up with a permanent pressure bruise on the panel and three more dead pixels for my trouble. It was a classic case of trying too hard to fix a delicate problem with a sledgehammer. Today, I am going to show you the precise, non-destructive method to revive those sub-pixels. We are going to focus on software-based stimulation and gentle thermal changes—the only methods that don’t involve risking the physical layers of your screen. Whether you’ve invested in high-end laptop accessories or you’re working on a budget setup, this fix is surprisingly universal.
Is This Flashing Color Trick Actually Worth the Hype?
You might be skeptical about whether a rapidly blinking screen can actually ‘wake up’ a pixel. It sounds like some kind of digital voodoo. However, the logic is sound: by rapidly cycling through the RGB spectrum, you are essentially forcing the liquid crystals to cycle their orientation thousands of times per minute, which can break them loose if they’ve simply become ‘stuck.’ According to the ISO 13406-2 standard, most manufacturers actually allow for a specific number of pixel defects—sometimes up to 5 per million pixels—before a panel is considered defective enough for a warranty claim. This is why learning this DIY fix is so vital; the manufacturer might not help you, but a bit of software often will. Have you ever noticed a bright dot on your screen and tried to ‘rub’ it away, only to make it worse? Drop a comment and let me know I’m not the only one who’s been that desperate. Before we dive into the specific software tools, make sure your machine isn’t just struggling with its environment; sometimes heat issues can cause temporary visual artifacts that look like hardware failure but are actually just the system begging for air. If you’re using high-performance gaming laptops or even reliable student laptops, the frustration is the same, but the solution is finally within reach.Before we jump into the fix, we have to identify what we are actually fighting. A dead pixel is black—it is gone, deceased, and likely a victim of a broken transistor. But a stuck pixel is usually bright red, green, or blue because the liquid crystal is just paralyzed. Think of it like a gear that has slipped its track; it is still getting power, it just does not know where to turn. I remember trying to help a friend with one of those unbeatable laptop deals he found online—a high-spec machine that arrived with a glowing red dot right in the crosshairs of his favorite FPS. We did not send it back; we spent forty minutes exercising the screen.
Force the Pixel to Wake Up with Software
The first step is a software assault. Tools like JScreenFix or various pixel-repairing YouTube videos work by flashing colors at a high frequency. You are not just showing your screen a light show; you are hitting that paralyzed crystal with a digital defibrillator. I usually recommend running these tools for at least 30 minutes. When I fixed that gaming rig, we actually let the tool run while we went to grab coffee. By the time we got back, the red dot had vanished. It is essentially forcing the pixel to cycle through every state until it snaps back into its proper rhythm. This works surprisingly well on student laptops that might have been handled a bit roughly in a backpack. 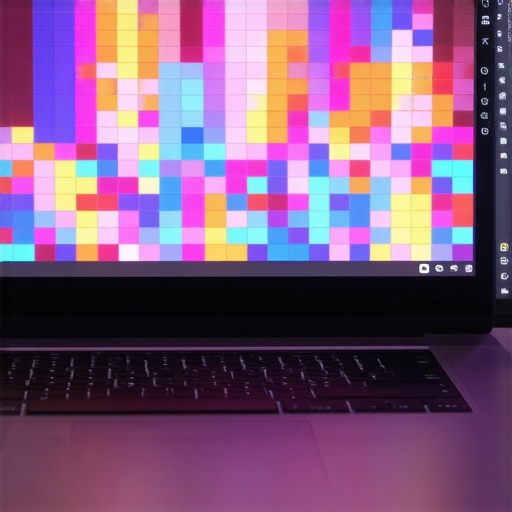
Try the Gentle Heat Trick
If the software does not do the trick, you need to introduce a tiny bit of heat. This is not the pencil eraser massage I warned you about earlier. Instead, use a warm (not hot!) damp cloth sealed inside a plastic bag. You want the heat to gently loosen the liquid crystal without getting any moisture near the bezel. If you have ever dealt with laptop screen backlight issues, you know how fragile these layers are. Apply the bag to the area of the stuck pixel for about thirty seconds while the screen is off, then turn it on and immediately run the flashing software again. The heat expands the material just enough to let the electrical signals do their job.
Target the Right Spot with Precision
It is also worth noting that screen density plays a role. This is one of the reasons we often avoid 4K displays on smaller laptops; the pixels are so incredibly small that if one gets stuck, it is harder to target, and the manufacturing tolerances are much tighter. If you are struggling to see the pixel clearly, you might need some laptop accessories like a magnifying desk lamp to ensure you are actually treating the right spot. For those using budget student laptop screens, these DIY methods are often the only way to maintain a clean display without paying for a professional repair that costs more than the device itself.
Why Your Screen Protector Is Actually Ruining Your Display
Let’s dig deeper into the myths of screen maintenance. You see them everywhere on Amazon—plastic sheets promising to protect your investment. But if you have an OLED or a high-end matte display, these ‘protective’ layers are a disaster. We actually stopped using laptop screen protectors entirely because the adhesive can chemically bond with the factory anti-glare coating over time. If you try to peel it off later, you might take the polarizer right with it. It is one of those laptop accessories that sounds great in theory but fails miserably in practice. Have you ever fallen into this trap of ‘over-protecting’ your gear and causing more damage? Let me know in the comments.
Stop Buying Those Loud Paperweights to Cool Your Machine
Everyone says cooling pads are essential for performance, especially when you are hunting for unbeatable laptop deals that might run a bit hot under pressure. In reality, most laptop cooling pads are just loud paperweights. They blow air at the external plastic chassis, not the internal heat pipes where the actual cooling is needed. If your machine is throttling, you are much better off learning how to replace your laptop thermal paste than relying on a $20 fan from a bargain bin. Many users fail to realize that modern gaming laptops are engineered with specific airflow paths that these generic pads can actually disrupt, causing air turbulence that keeps hot air trapped inside the casing. Another common ‘oops’ factor is using ammonia-based cleaners like Windex on a student laptop; it strips the oleophobic coating, making every future fingerprint essentially permanent.
Does Pixel Density Make Manual Repair Impossible?
Let us talk about the ‘High-DPI’ trap. On a standard 1080p screen, a pixel is a manageable size for a gentle software fix. But on high-end business laptops with 4K panels, the pixels are so microscopic that the physical ‘heat and massage’ method I mentioned earlier becomes incredibly dangerous. You are not just pressing on one pixel; you are potentially crushing a cluster of twenty. This is one of the primary reasons we often avoid 4K displays on smaller laptops. The tighter the manufacturing tolerances, the less room you have for DIY fixes. According to the ISO 9241-302 ergonomic standard—which replaced the older ISO 13406-2—even premium panels are allowed a certain number of sub-pixel defects before they are considered ‘broken.’ If you are working on a budget machine, you might also be dealing with the hidden trap of budget gaming screens: motion blur, which can mask a stuck pixel during high-speed gameplay but make it glaringly obvious during document work. Don’t let the marketing hype about ‘extreme protection’ or ‘turbo cooling’ distract you from the reality of how these machines are built. Precision and patience will always beat a generic accessory.
Once you have handled the immediate crisis of a stuck pixel, you start to realize that owning high-end hardware isn’t just about the purchase; it is about the long-term stewardship. I have seen too many people snag unbeatable laptop deals only to let the machine turn into a sluggish, dusty paperweight within eighteen months. Maintaining your gear doesn’t require a degree in electrical engineering, but it does require moving past the generic advice found on the back of a cleaning spray bottle.
Ditch the Cheap Screwdrivers for Real Gear
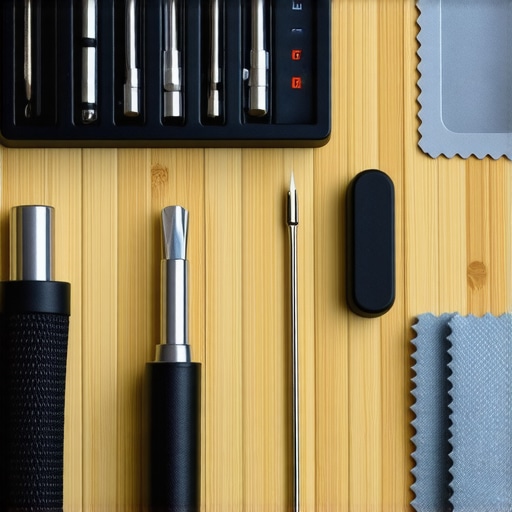
The first thing I tell anyone building a professional setup is to stop using the free tools that come with replacement parts. If you are going to perform surgery on your business laptops, you need a set of hardened steel precision drivers. I personally use an iFixit Pro Tech Toolkit because the bits don’t strip the soft screws manufacturers love to hide under rubber feet. When you decide it is time to replace your laptop thermal paste without breaking anything, having a non-marring spudger is the difference between a clean upgrade and a scarred chassis. I also keep a canister of 99% isopropyl alcohol nearby; anything less contains too much water and can cause corrosion on the motherboard traces.
My Secret Software for Predicting Hardware Failure
Prevention is always cheaper than a cure. To keep my gaming laptops running at peak performance, I rely on HWInfo64 and Intel’s Power Gadget. According to Intel’s technical documentation on Thermal Design Power (TDP), consistent operation near the ‘T-Junction’ temperature leads to accelerated electromigration, which effectively ages your processor. I use these tools to monitor my thermals weekly. If I see a 10-degree spike during normal tasks, I know it is time to check my laptop fan for dust without opening it. This proactive approach saves me from the ‘surprise’ of a dead machine right before a deadline.
How do I maintain my laptop’s longevity over time?
The biggest factor in how long your machine lasts isn’t the CPU—it is the battery and the hinges. To keep the power cell healthy, we never leave our laptops plugged in overnight. Keeping a lithium-ion battery at 100% capacity in a high-heat environment is the fastest way to cause cell swelling. I also make it a habit to calibrate the laptop battery for better accuracy every three months. This ensures the Windows battery percentage actually reflects reality, so you don’t get a sudden black screen while taking notes on student laptops in the middle of a lecture. For the hardware itself, I prioritize machines where I can swap components; this is why we only buy laptops with user-replaceable wifi cards and RAM. If a $20 card fails, I don’t want to replace a $2,000 motherboard.
The Future of Self-Repair and Modular Parts
I predict we are moving toward a ‘right to repair’ renaissance. The trend of soldering every component is finally hitting a wall of consumer frustration. In the next few years, I expect even major manufacturers to follow the lead of modular pioneers, making display panels and keyboards easily swappable without proprietary adhesive. This shift will make maintaining your tech less of a chore and more of a standard routine. If you want to stay ahead of the curve, I highly recommend downloading a hardware monitor today and logging your baseline temperatures—knowing what ‘normal’ looks like is your best defense against future failure.
Lessons My Cracked Screen Taught Me About DIY Repairs
I have spent thousands of hours staring at displays, and if there is one thing I have learned, it is that patience is your most valuable tool. First, never assume a bright dot is a permanent failure; liquid crystals are stubborn, but they are not always broken. Second, I have found that expensive laptop accessories like heavy-duty cleaning gels can actually seep into the bezel and short out the backlight if you are not careful. Third, always document the pixel behavior with a macro photo before you try a fix; it helps you see if the exercise software is actually making a difference. Finally, remember that even high-end business laptops have a breaking point where a software fix won’t help, and knowing when to stop is just as important as knowing how to start.
The Toolkit I Use to Rescue Dying Panels
When a friend brings me a machine with display artifacts, I do not reach for a screwdriver first. I start with JScreenFix because it is a browser-based tool that requires zero installation—perfect for a quick test. For more intensive recovery on gaming laptops, I use specialized YouTube pixel repair loops that I let run for several hours. I also suggest checking why most laptop cooling pads are a waste of money, as keeping your internal temps down prevents the kind of heat-related pixel fatigue that starts these problems in the first place. Lastly, if you are actually opening the case to check a loose ribbon cable, a genuine iFixit toolkit is the only way to avoid stripping screws on student laptops.
#IMAGE_PLACEHOLDER_E#
Save Your Screen Without Spending a Fortune
You do not need to be a certified technician to extend the life of your device. By applying these gentle software techniques and staying away from high-pressure ‘massages’ that cause permanent bruising, you can effectively manage a stuck pixel and avoid the massive cost of a full panel replacement. Whether you are currently hunting for unbeatable laptop deals or just trying to keep your current daily driver alive, your screen is the primary window to your productivity. Treat it with a little respect and a bit of digital exercise, and it will serve you for years to come. Have you ever successfully revived a ‘dead’ spot on your screen using software, or did it eventually win the battle? Let me know your experience in the comments below!